How to butterfly and pound chicken breasts for even cooking
Butterflying and pounding chicken breasts gives you an even thickness so they cook quickly and stay moist. This guide walks you through safe, simple steps using common kitchen tools so your chicken finishes at the same time and looks great. You’ll learn how to prepare, butterfly, and pound without tearing the meat.
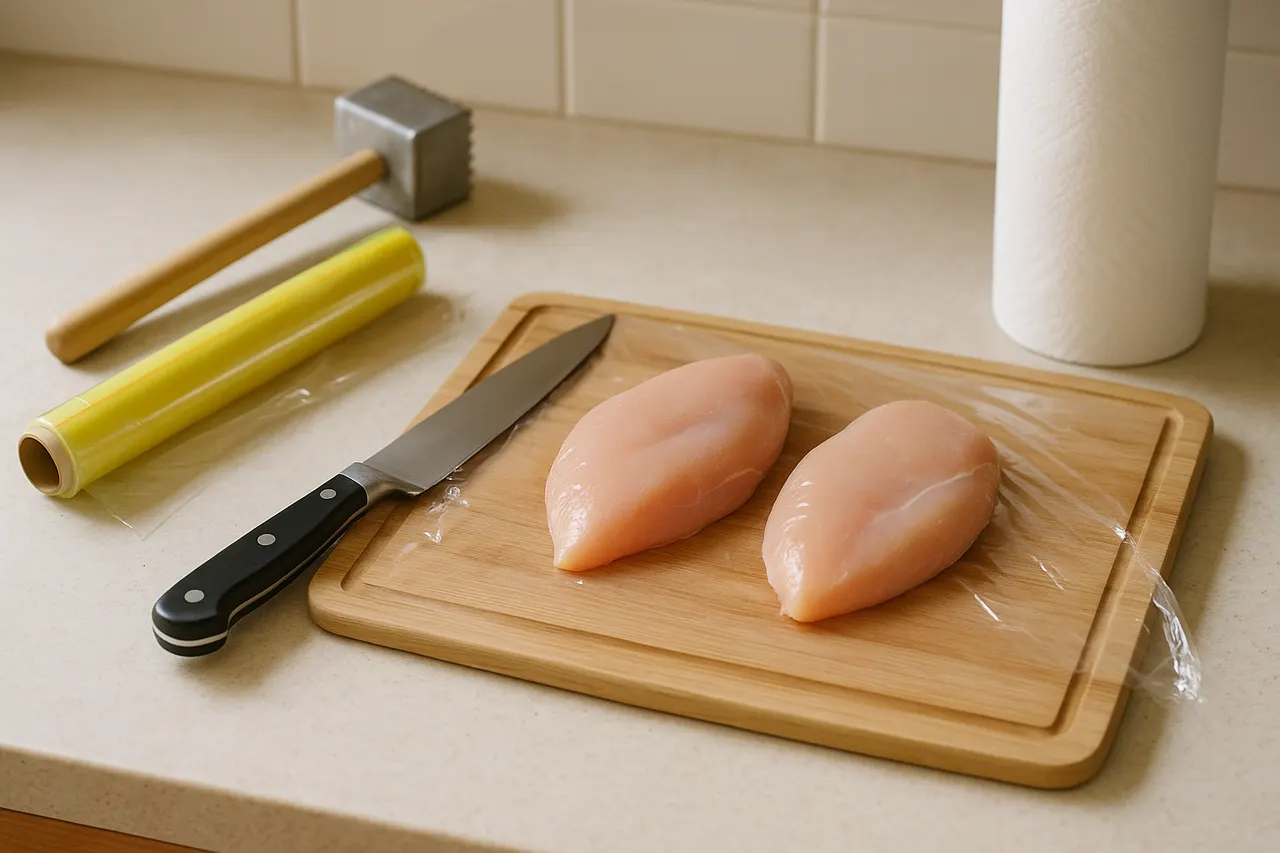
Step 1: Gather tools and ingredients
Collect a cutting board, a sharp knife, plastic wrap or a resealable bag, a meat mallet or heavy skillet, paper towels, and a ruler or measuring tape. Have 1 to 2 boneless skinless chicken breasts ready and a clean workspace; being organized speeds the process and reduces contamination risk.
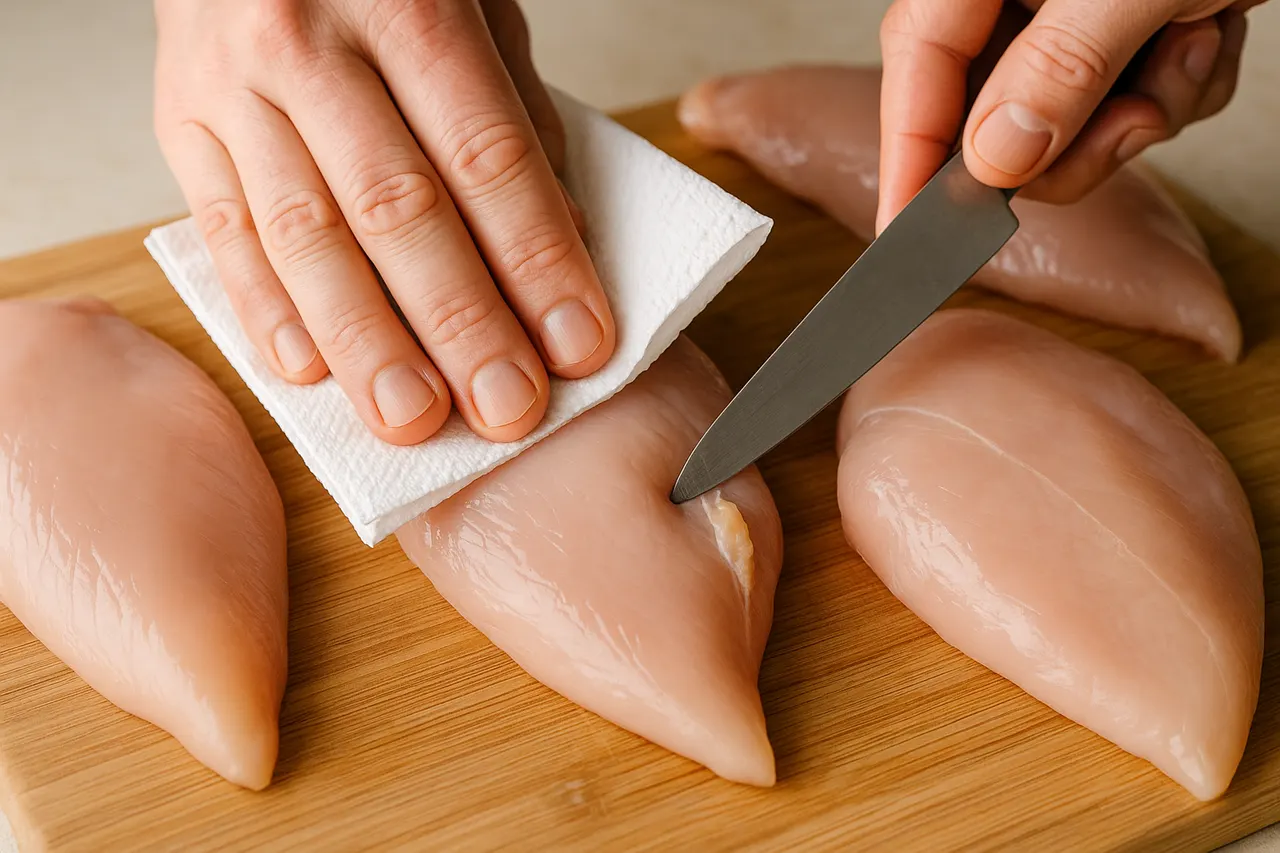
Step 2: Trim and pat dry
Trim excess fat and connective tissue with a sharp knife, then pat each breast dry with paper towels. Drying the surface improves grip and prevents slipping while cutting and pounding, and it helps seasonings adhere.
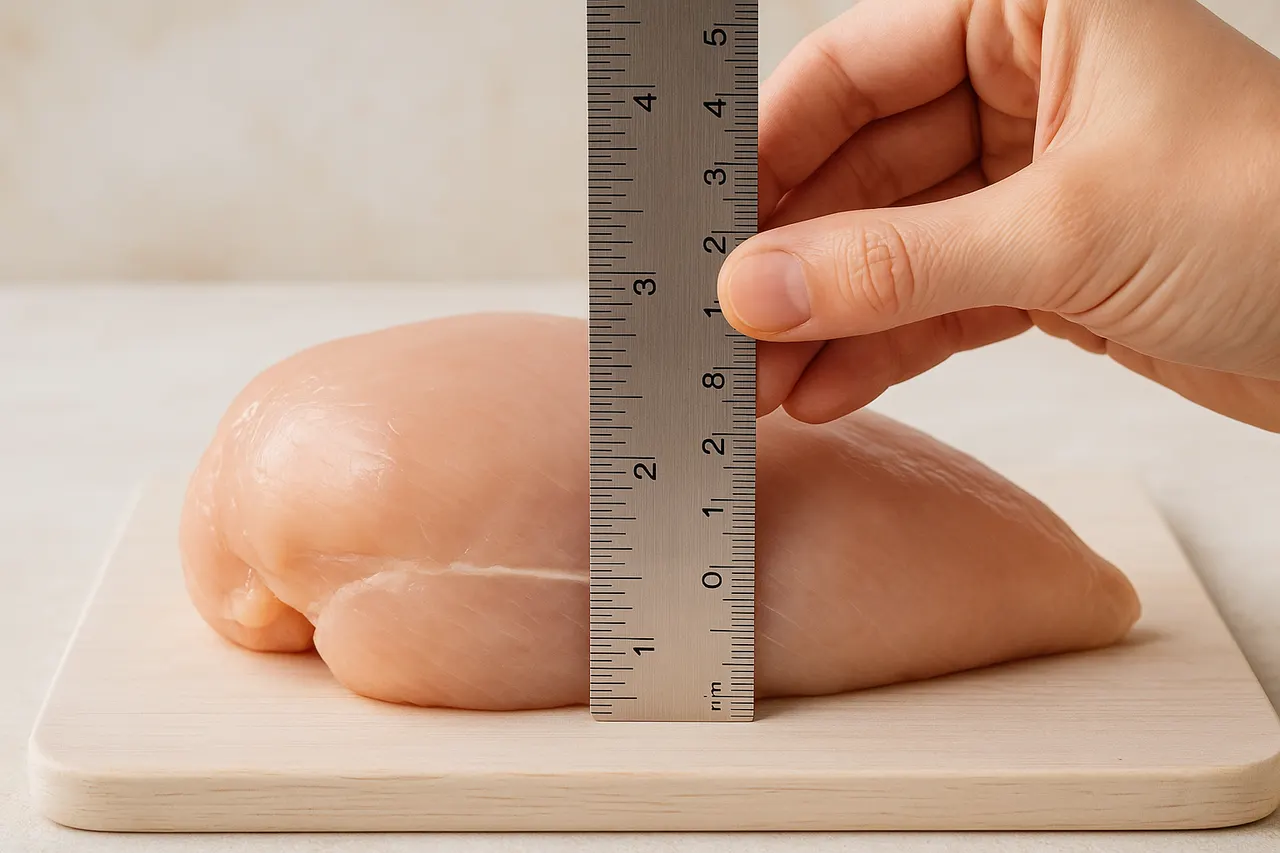
Step 3: Measure thickness
Use a ruler to measure the thickest part of the breast; note if it’s over 1 inch (2.5 cm) thick. Knowing the starting thickness helps you aim for an even finished thickness of about 1/2 inch (1.2 cm) for quick, even cooking.
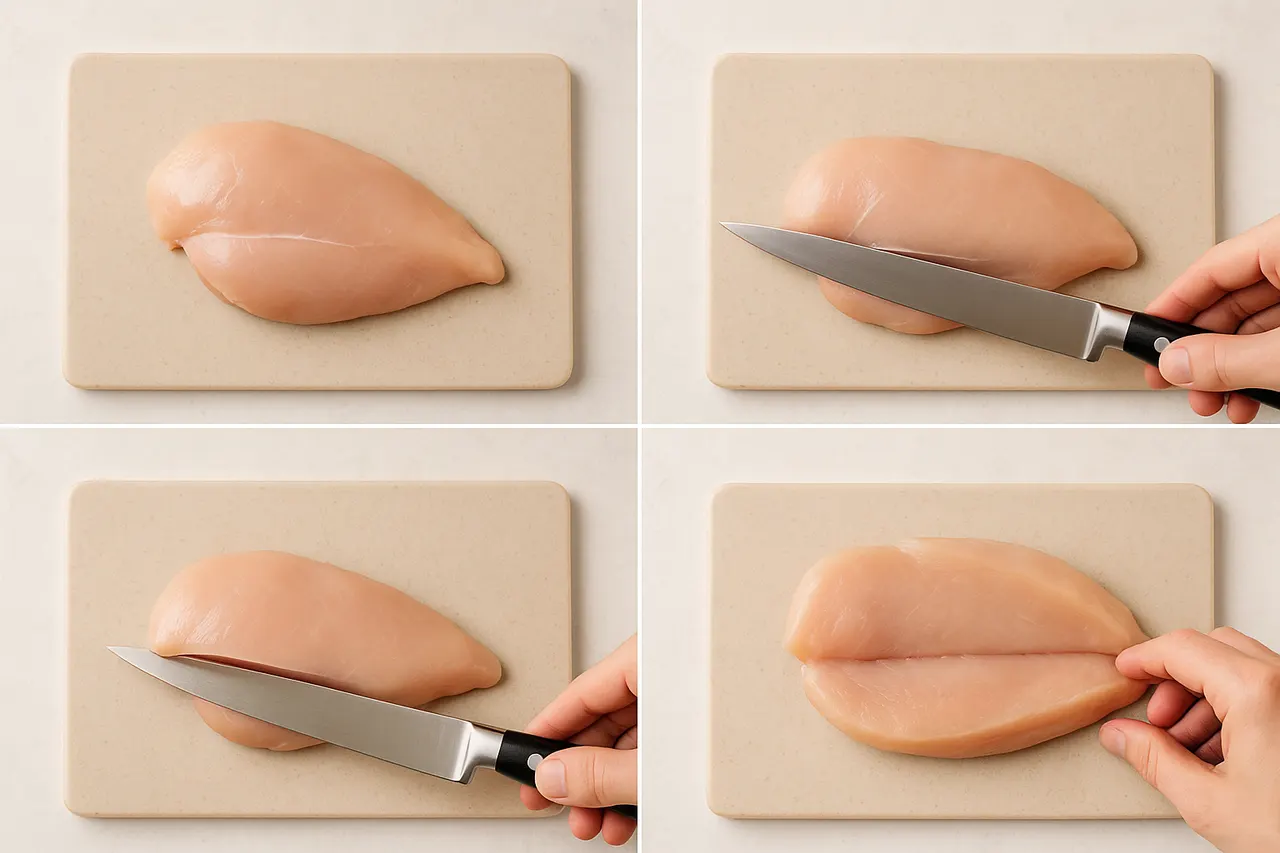
Step 4: Butterfly the breast
Place the breast flat on the cutting board with the smooth side down. Hold your knife parallel to the board and slice horizontally into the thickest side, stopping about 1/4 inch (0.6 cm) from the opposite edge so the halves remain attached; open like a book. This creates a larger, more even surface without cutting the breast in two.
Step 5: Cover with plastic and secure
Place the butterflied breast between two sheets of plastic wrap or inside a resealable bag and press out excess air. The plastic prevents tearing and keeps splatter contained when you pound the meat to an even thickness.

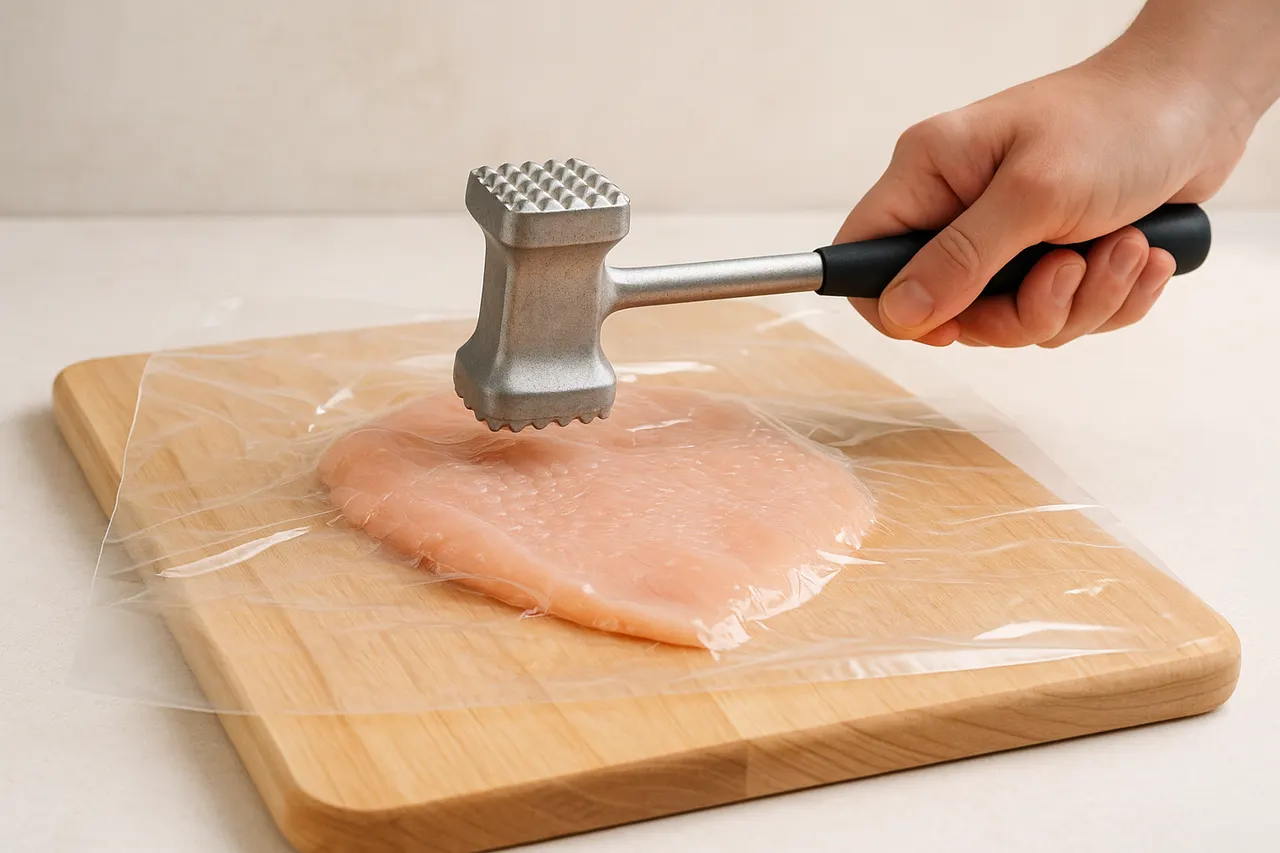
Step 6: Pound gently and evenly
Using the flat side of a meat mallet or the bottom of a heavy skillet, strike the breast starting from the center and working outward in 6 to 10 firm but controlled hits until the thickness is about 1/2 inch (1.2 cm). Aim for even pressure across the surface; pounding too hard can tear fibers and make texture spongy.
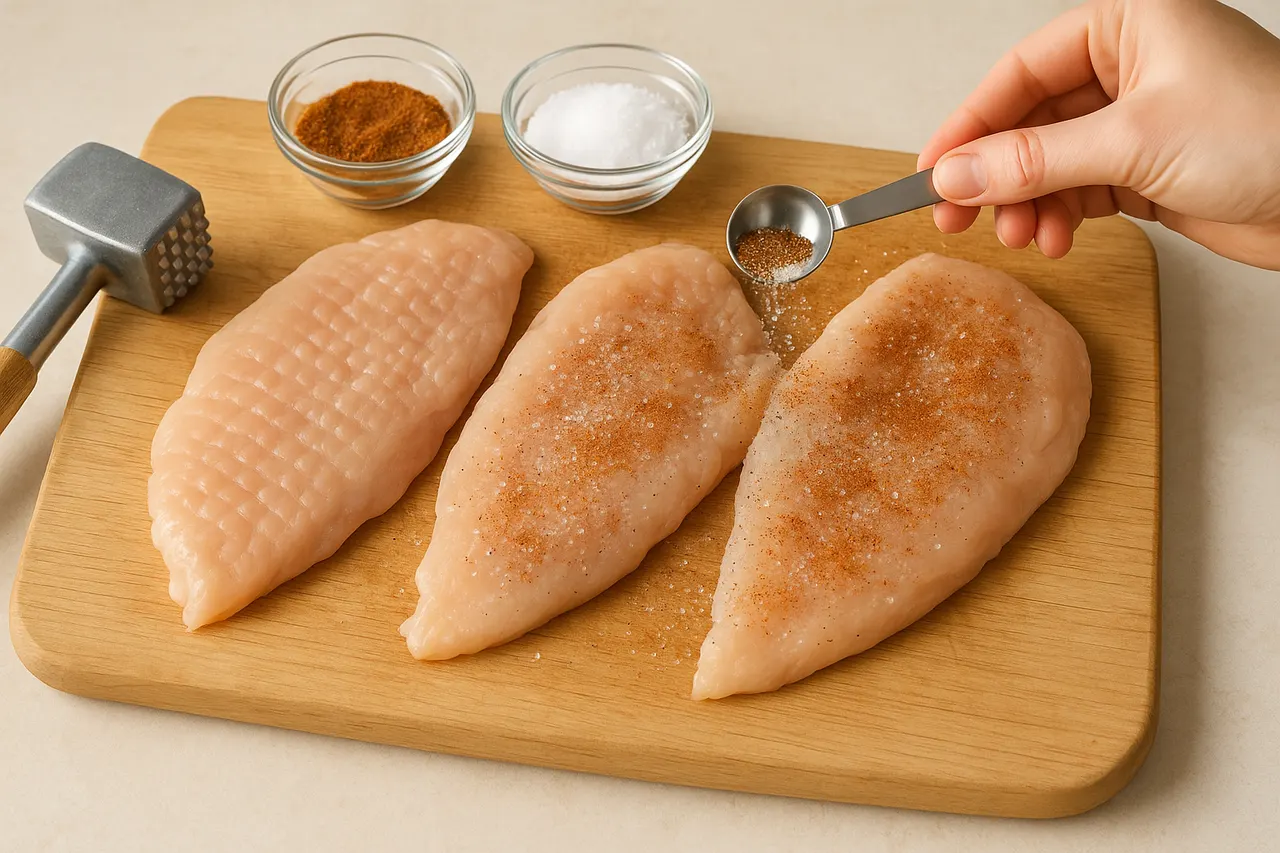
Step 7: Check and season before cooking
Remove the plastic, measure thickness again in several spots to confirm evenness, and pat once more if needed. Season with 1/2 to 1 teaspoon salt per breast and other spices or marinade for 15 to 30 minutes before cooking to improve flavor and juiciness.
- Work with one breast at a time to maintain control and avoid tears.
- If breasts are very uneven, fold a small flap of thicker meat under before pounding to distribute thickness.
- Use the smooth flat side of a mallet for even pressure; avoid the textured side if you want an unmarked surface.
- If you don’t have a ruler, aim visually for about 1/2 inch (about the thickness of a nickel) for even cooking.
- Marinate for at least 15 minutes or up to 2 hours; acidic marinades longer than 2 hours can change texture.
- For extra hygiene, clean the cutting board and tools with hot, soapy water after handling raw chicken and before using them again.
- Always wash hands before and after handling raw chicken to prevent cross-contamination.
- Do not wash raw chicken under running water; that spreads bacteria. Pat dry instead.
- Discard any plastic wrap that contacted raw chicken or wash a reusable bag immediately in hot, soapy water.
- If meat tears badly while butterflying, trim torn edges or use foil to cover holes; do not consume meat with off smells or slimy texture.
Was this guide helpful?
More Food & Entertaining guides
How to make stovetop shakshuka with tender eggs and balanced tomato sauce
Shakshuka is a comforting North African–style skillet of eggs poached in a spiced tomato sauce. This guide walks you through building a balanced sauce and gently cooking tender eggs on the stovetop so yolks stay silky while the sauce is bright and flavorful.
How to make homemade sourdough starter and maintain regular feedings
Making a sourdough starter is a simple, rewarding kitchen project that captures wild yeast and beneficial bacteria to leaven bread. With just flour, water, and a little patience you can build a lively culture and keep it healthy with regular feedings. Follow the step-by-step routine below to create and maintain a starter that will power many loaves.
How to assemble and store layered salads so they don’t get soggy before eating
Layered salads are a colorful, make-ahead way to serve a crowd, but soggy ingredients can ruin the texture. With a few simple construction and storage strategies you can keep greens crisp and dressings separated for 24–72 hours. Follow these steps to assemble jars or bowls that travel well and taste fresh when served.