How to grill vegetables without burning them
Grilling vegetables is a quick way to add smoky flavor and satisfying char without turning them into mush or ash. With a few simple techniques—choosing the right cuts, controlling heat, and using a light coating of oil—you can get tender interiors and nicely browned edges every time. This guide walks through practical steps so you can grill confidently and enjoy flavorful results.
Step 1: Select vegetables wisely
Pick firm, fresh vegetables that grill well: bell peppers, zucchini, eggplant, asparagus, mushrooms, corn, red onion, and cherry tomatoes on skewers. Avoid watery greens like spinach or delicate herbs; they wilt too quickly and can burn. Choose similarly dense items so they cook at the same rate.

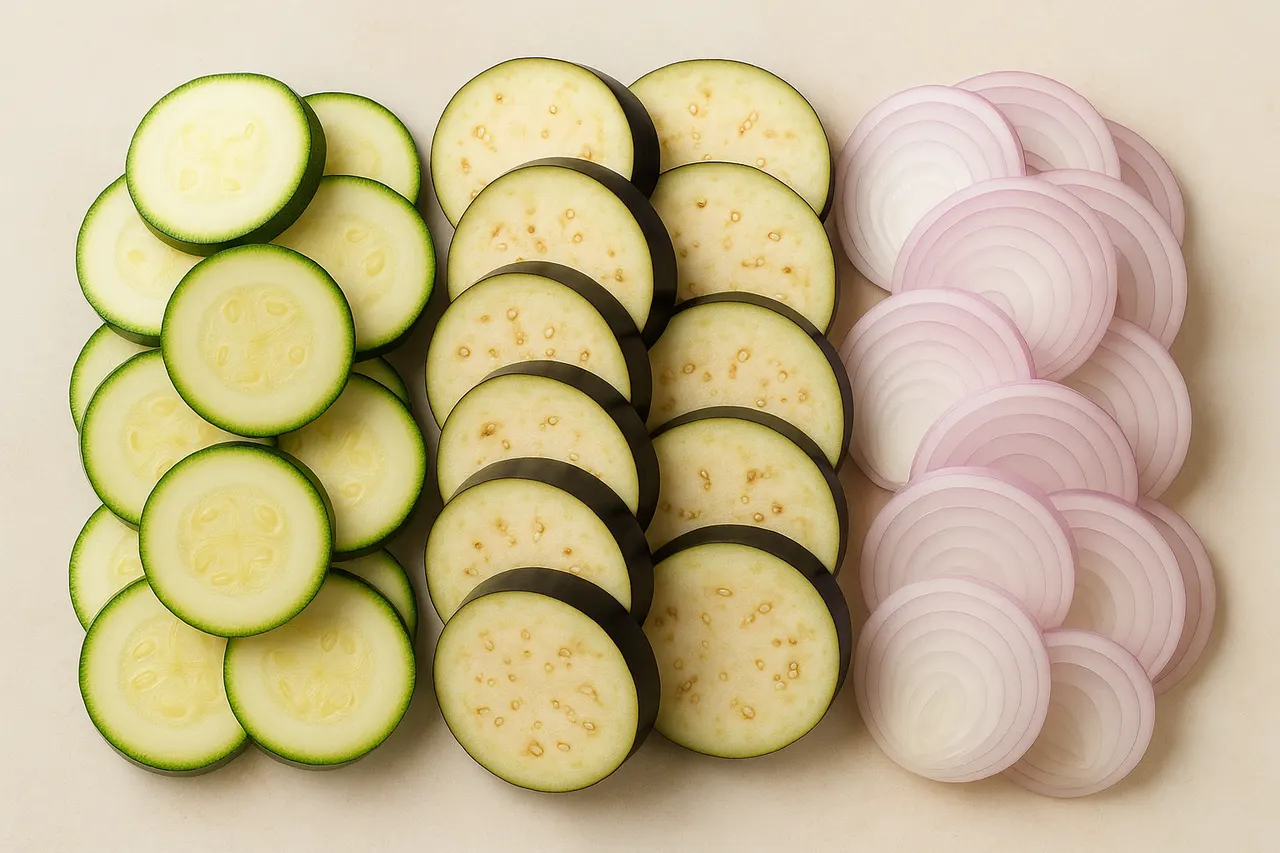
Step 2: Prepare uniform pieces
Cut vegetables into consistent sizes: 1/2-inch to 3/4-inch slices for zucchini and eggplant, 3-4 inch spears for asparagus, 1/2-inch wedges for onion, and leave mushrooms whole or halved. Uniform pieces ensure even cooking and prevent thin edges from burning while the center remains raw.
Step 3: Parboil or precook dense items
For dense vegetables like potato, carrot, or sweet potato, simmer 5-8 minutes until just tender but not falling apart. This reduces required grill time and protects exteriors from charring before interiors cook through. Drain and cool briefly before oiling and grilling.

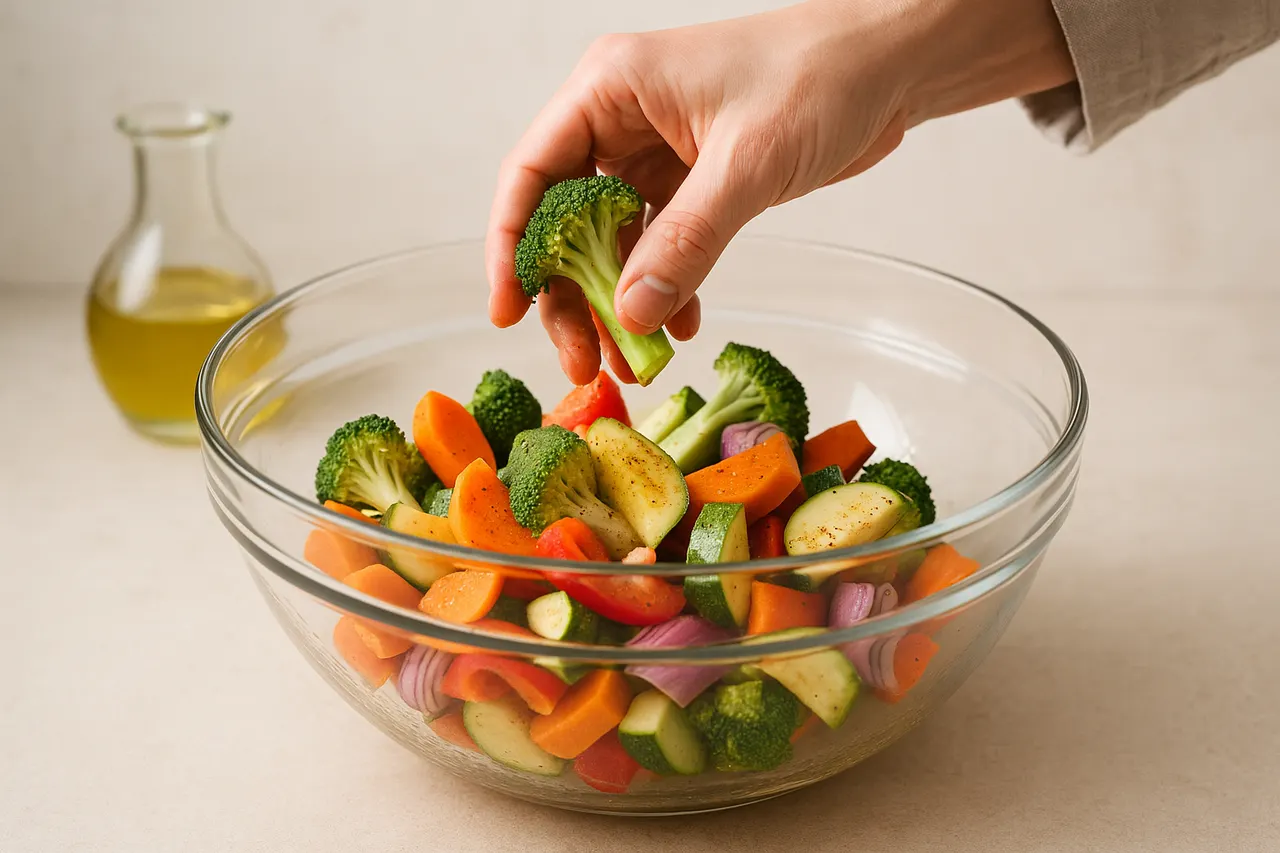
Step 4: Oil lightly and season
Toss vegetables in 1-2 tablespoons oil per pound—enough to coat but not drip—using high-smoke-point oils like avocado, grapeseed, or refined olive oil. Season with salt, pepper, and optional herbs; oil creates a protective barrier to prevent sticking and burning while promoting even browning.
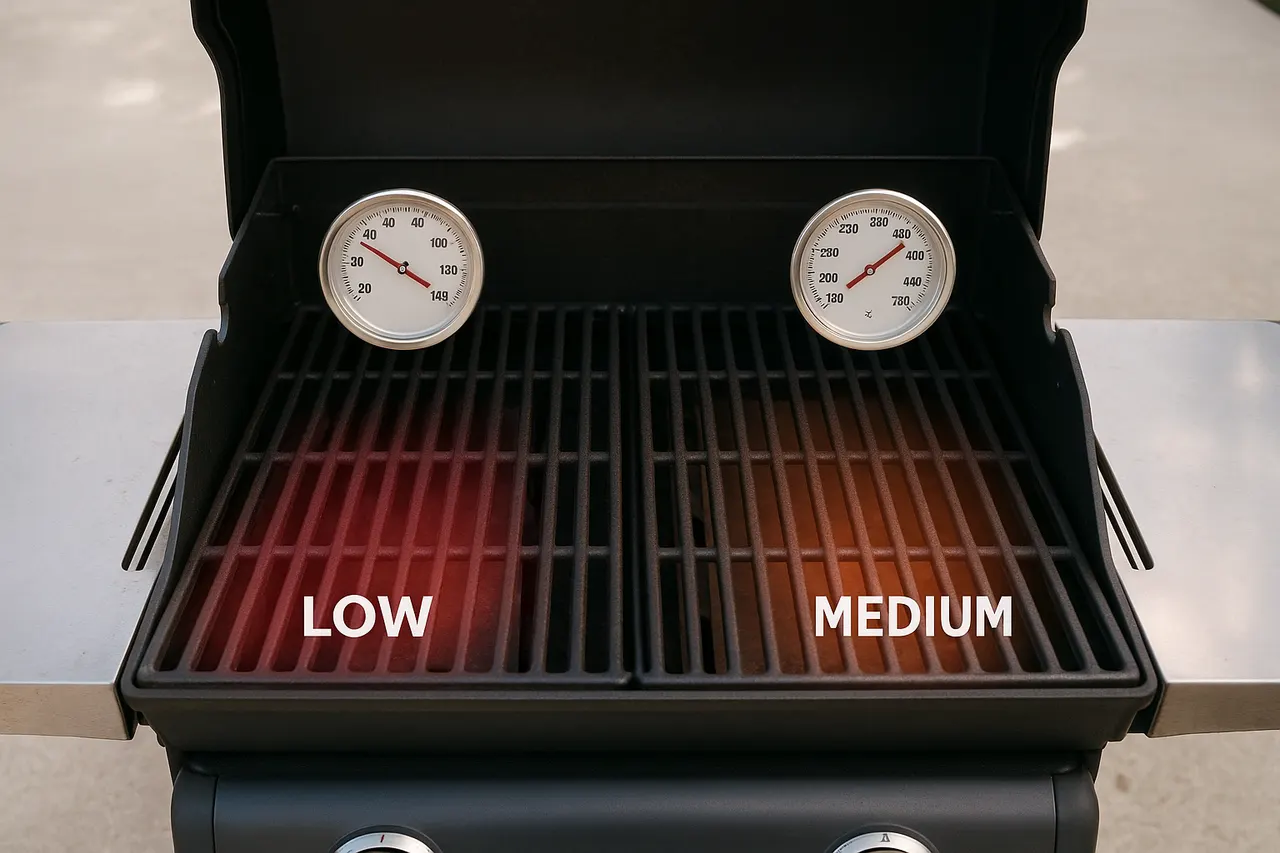
Step 5: Preheat and control the grill
Preheat grill to medium-high (about 375–450°F / 190–230°C) for 10–15 minutes, then clean and oil grates. Create heat zones by turning one side to medium (350°F) and keeping the other side lower for indirect cooking; this allows you to move pieces if flare-ups occur and to finish thicker items gently.
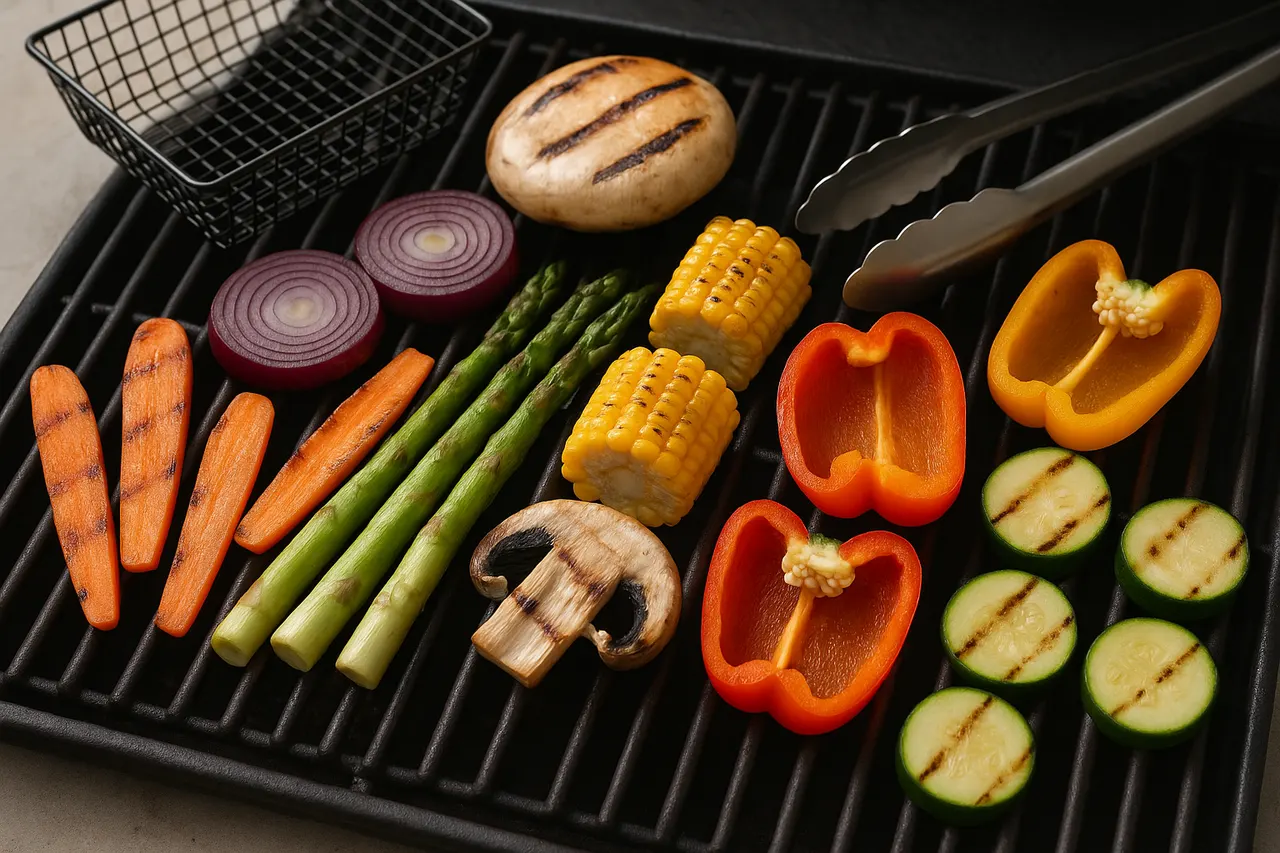
Step 6: Use proper placement and tools
Place larger, denser pieces directly over medium heat and thinner pieces on the cooler side or on a cedar plank. Use tongs or a spatula and a grill basket for small items like cherry tomatoes or sliced mushrooms to prevent loss through grates. Leave space between pieces for air circulation and even charring.
Step 7: Monitor, flip, and rest
Grill until grill marks appear and vegetables are tender when pierced—typically 3–6 minutes per side for most cuts; thicker items may need 8–12 minutes total. Flip once or twice and move to the cooler side if flare-ups happen. Remove from heat and rest 2–5 minutes so juices redistribute and carryover heat completes cooking.
- Dry vegetables well before oiling to help oil adhere and prevent steaming.
- Use skewers or grill baskets for small items; soak wooden skewers 30 minutes before use to avoid burning.
- Cut at a slight angle to increase surface area for more even browning.
- Marinate briefly (15–30 minutes) with acid and oil to add flavor, but avoid long acidic marinades that can break down texture.
- Brush with a little extra oil during grilling if edges start to dry out, about 1 teaspoon at a time.
- Test doneness with a fork: tender but still slightly firm is ideal—avoid mushy texture.
- Watch for flare-ups from dripping oil—move vegetables to a cooler zone immediately to prevent charring.
- Do not leave the grill unattended while vegetables are cooking; thin pieces can go from perfect to burnt in under a minute.
- Avoid overcrowding the grill; crowded food steams and increases chance of uneven cooking and burning.
- Be careful with high-sugar glazes (like honey or balsamic) near direct flame—apply in the last 1–2 minutes to prevent burning.
Was this guide helpful?
More Food & Entertaining guides
How to make stovetop shakshuka with tender eggs and balanced tomato sauce
Shakshuka is a comforting North African–style skillet of eggs poached in a spiced tomato sauce. This guide walks you through building a balanced sauce and gently cooking tender eggs on the stovetop so yolks stay silky while the sauce is bright and flavorful.
How to make homemade sourdough starter and maintain regular feedings
Making a sourdough starter is a simple, rewarding kitchen project that captures wild yeast and beneficial bacteria to leaven bread. With just flour, water, and a little patience you can build a lively culture and keep it healthy with regular feedings. Follow the step-by-step routine below to create and maintain a starter that will power many loaves.
How to assemble and store layered salads so they don’t get soggy before eating
Layered salads are a colorful, make-ahead way to serve a crowd, but soggy ingredients can ruin the texture. With a few simple construction and storage strategies you can keep greens crisp and dressings separated for 24–72 hours. Follow these steps to assemble jars or bowls that travel well and taste fresh when served.