How to knead bread dough by hand effectively
Kneading by hand develops gluten for a better loaf and connects you to the baking process. With a few simple techniques and 10–15 minutes of focused work, you can transform a shaggy dough into a smooth, elastic ball ready to rise. Keep your workspace lightly floured, your movements deliberate, and your hands relaxed.
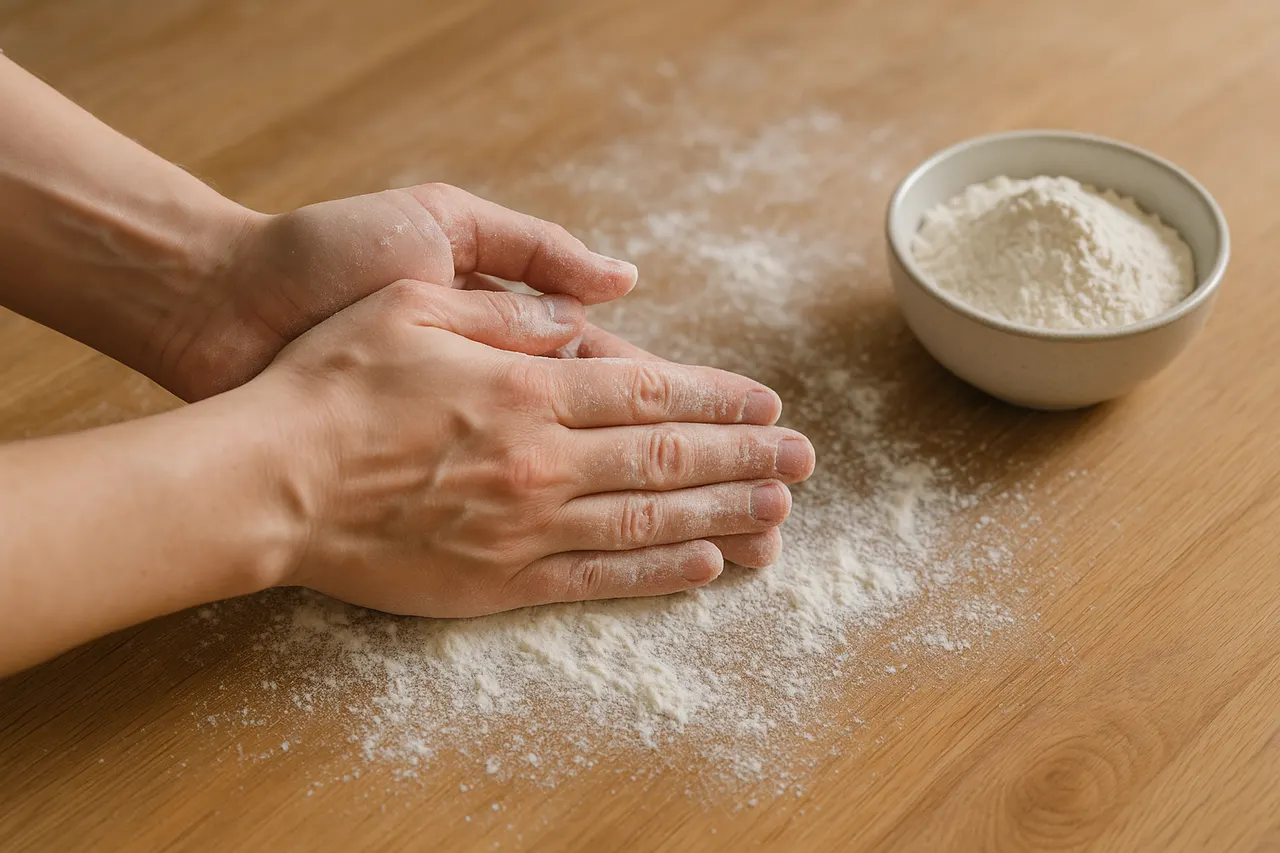
Step 1: Prepare your surface and hands
Lightly dust a clean countertop or large wooden board with 1–2 teaspoons of flour to prevent sticking without drying the dough. Wash and dry your hands, then lightly oil them if dough is very sticky; avoid adding too much flour or oil because they change hydration and texture.
Step 2: Turn dough onto the work surface
Gently scrape the dough from the bowl with a flexible spatula and fold it onto the floured surface. Keep the seam side down so initial surface tension forms, which helps shape the dough and reduces tearing during kneading.

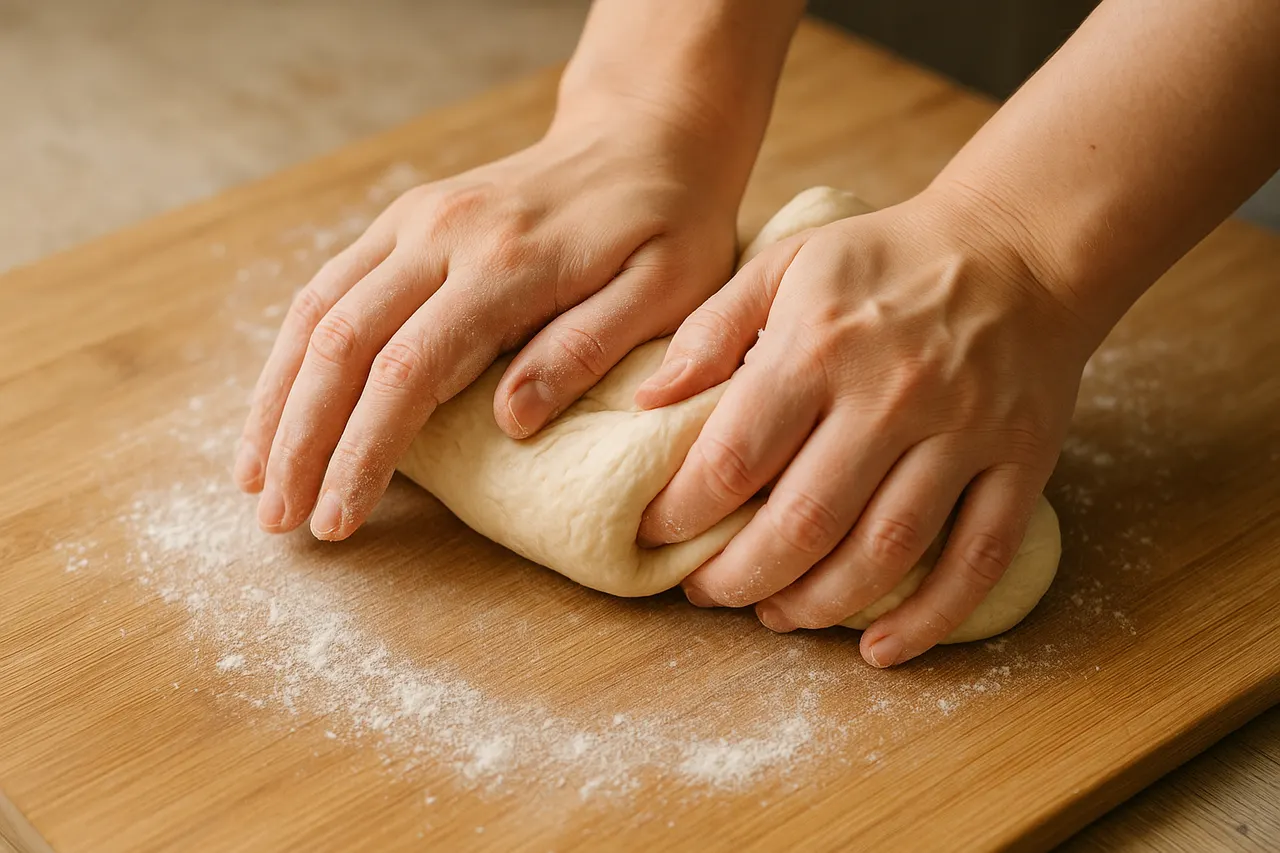
Step 3: Use the heel-and-fold motion
Push the dough away from you with the heel of your hand using a firm, even stroke of 6–8 inches, then fold it back toward you and give it a quarter turn. Repeat this motion rhythmically; it builds strength and aligns gluten strands for 8–12 minutes.
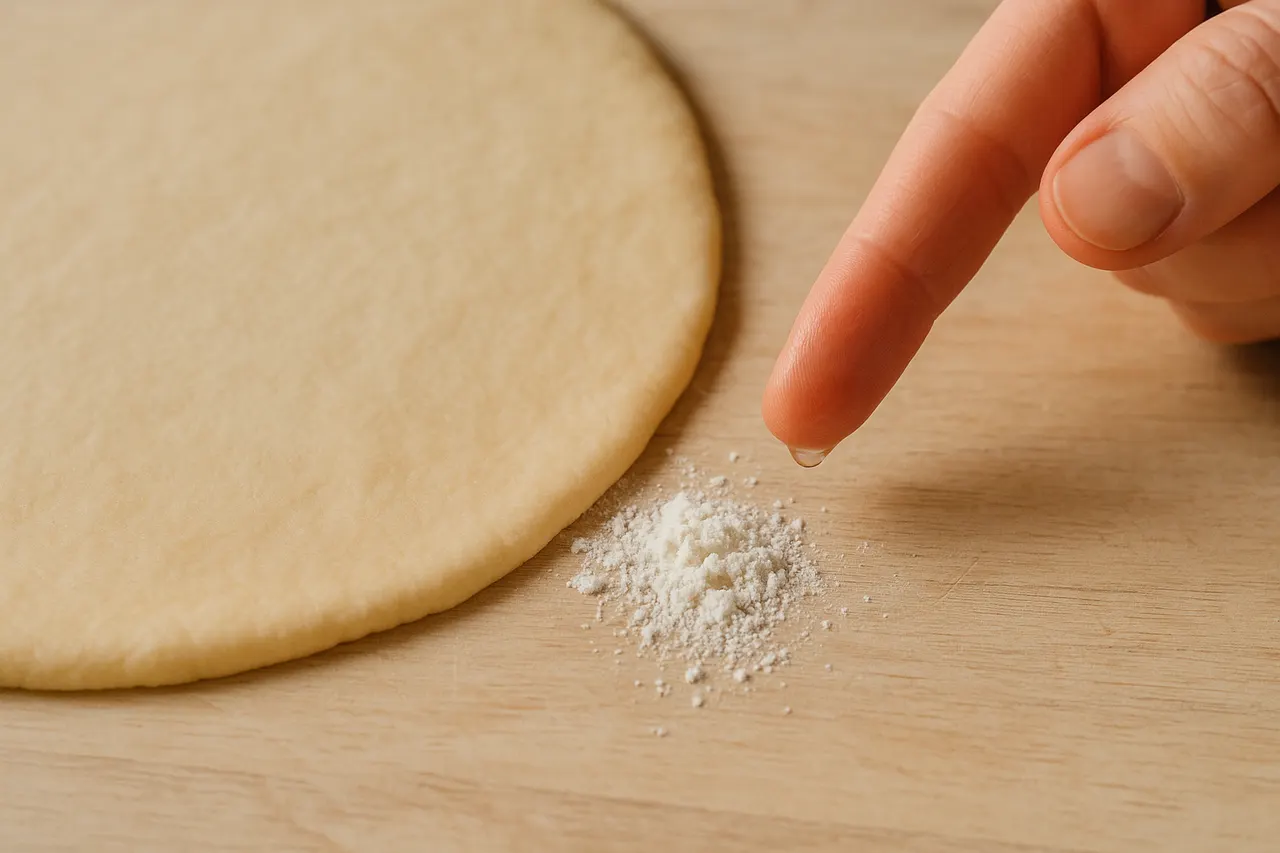
Step 4: Check for stickiness and adjust
If dough sticks excessively, dust the surface with 1 teaspoon more flour at a time—no more than 1–2 tablespoons total. If dough feels dry and tears, wet your hands with a few drops of water to reincorporate moisture rather than adding lots of flour.
Step 5: Test for windowpane
After about 8–10 minutes, pinch off a golf-ball-sized piece and stretch it thin between your fingers. If a translucent 'window' forms without tearing, gluten is developed; if it tears, knead 2–4 more minutes and test again.

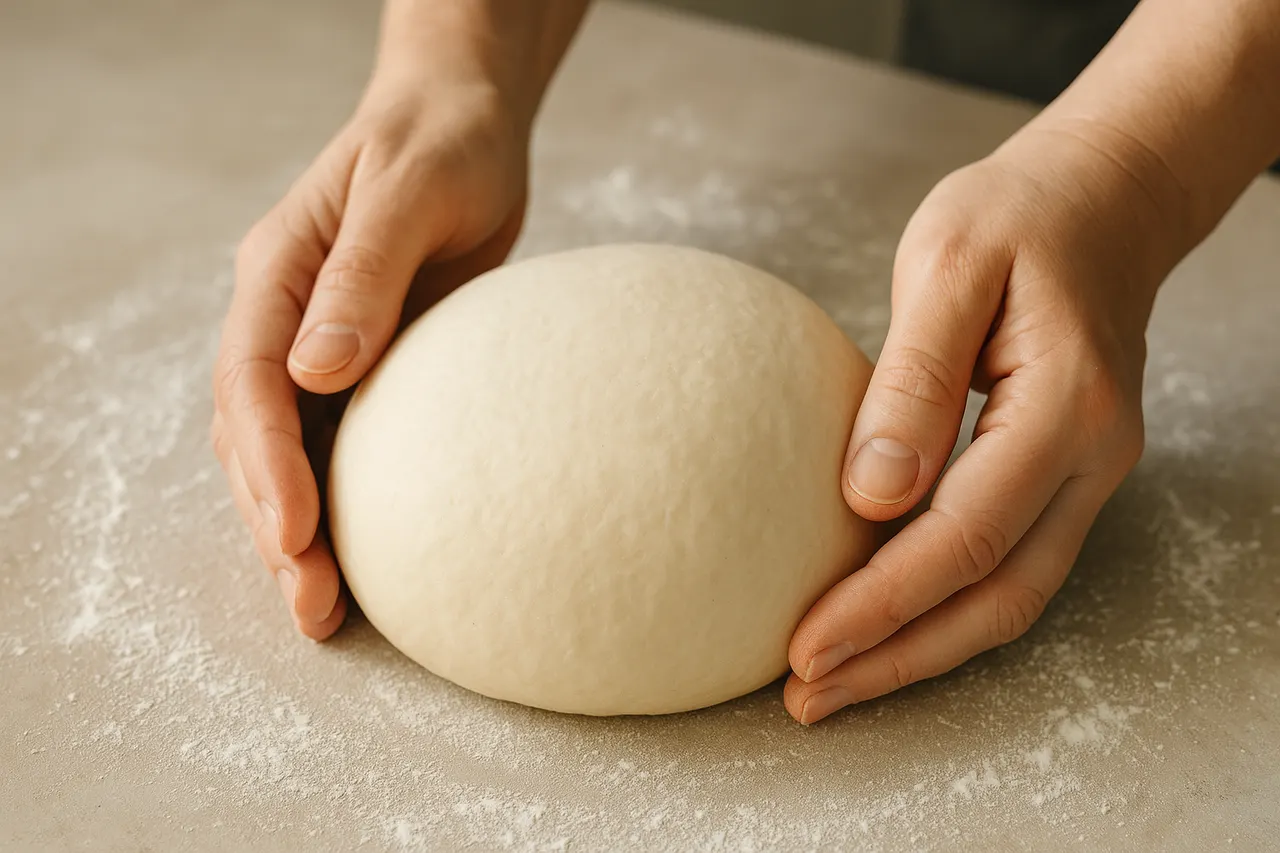
Step 6: Shape into a tight ball
Gather the dough into a smooth round by pulling edges under toward the center and rotating it on the board to create surface tension. A tight skin helps the dough rise upward rather than spread outward during the first proof for 1–2 hours.
Step 7: Rest and avoid over-kneading
Place the kneaded dough seam-side down in a lightly oiled bowl, cover with plastic or a damp towel, and let it rest for the recipe’s specified bulk rise, usually 1–2 hours at room temperature. Stop kneading once dough passes the windowpane test; over-kneading makes dough stiff and hard to shape.

- Work in a room around 70–75°F (21–24°C) to keep yeast activity predictable and dough feel consistent.
- Use a timer and aim for 8–12 minutes of steady kneading for typical white or whole-wheat doughs; adjust for hydration and flour type.
- A stand mixer does the job but hand kneading gives better feel — you’ll notice changes in tackiness and elasticity.
- If your hands get tired, allow the dough to rest 5–10 minutes to relax gluten, then resume kneading for a short burst.
- Keep a small damp cloth nearby to wipe flour off your fingers without adding it to the dough.
- Practice with smaller batches (500 g flour) until you learn the tactile cues of properly kneaded dough.
- Don’t add large amounts of flour to combat stickiness—this leads to dry, dense bread.
- Avoid aggressive pounding motions; forceful hits can tear gluten and introduce too much air into some doughs.
- Beware of over-kneading with a mixer; dough that tears instead of stretches is overworked and will produce a poor crumb.
- If dough smells sharply sour or has mold, discard and start again—this indicates spoilage or contamination.
Was this guide helpful?
More Food & Entertaining guides
How to make stovetop shakshuka with tender eggs and balanced tomato sauce
Shakshuka is a comforting North African–style skillet of eggs poached in a spiced tomato sauce. This guide walks you through building a balanced sauce and gently cooking tender eggs on the stovetop so yolks stay silky while the sauce is bright and flavorful.
How to make homemade sourdough starter and maintain regular feedings
Making a sourdough starter is a simple, rewarding kitchen project that captures wild yeast and beneficial bacteria to leaven bread. With just flour, water, and a little patience you can build a lively culture and keep it healthy with regular feedings. Follow the step-by-step routine below to create and maintain a starter that will power many loaves.
How to assemble and store layered salads so they don’t get soggy before eating
Layered salads are a colorful, make-ahead way to serve a crowd, but soggy ingredients can ruin the texture. With a few simple construction and storage strategies you can keep greens crisp and dressings separated for 24–72 hours. Follow these steps to assemble jars or bowls that travel well and taste fresh when served.