How to make a classic French omelette
A classic French omelette is soft, silky, and just set — a quick, elegant dish you can make in under 10 minutes. This guide breaks the technique into clear steps with concrete timing and quantities so you can practice and get consistent results.
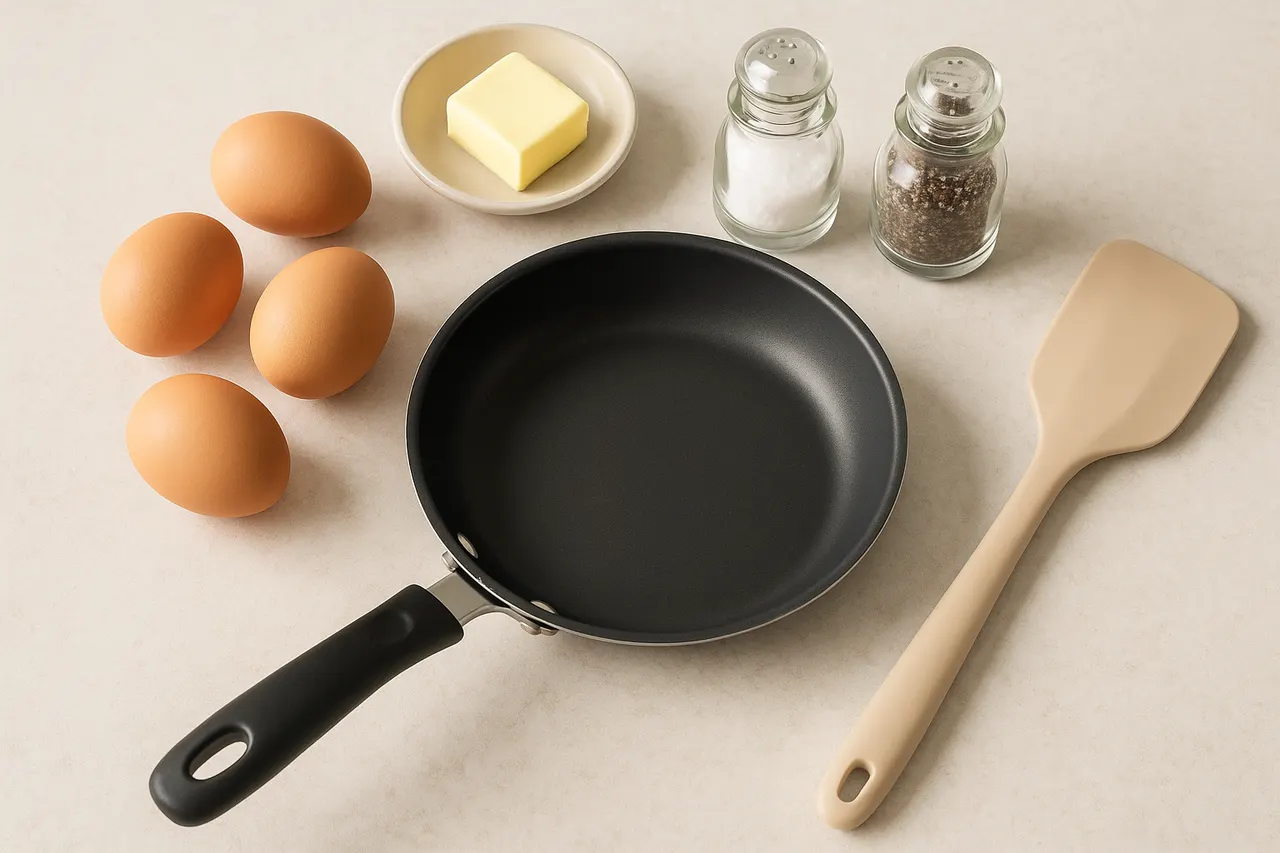
Step 1: Gather ingredients and tools
Measure 3 large fresh eggs, 1 tablespoon unsalted butter, 1/8 teaspoon fine salt, and a pinch of pepper. Use a nonstick 8-inch (20 cm) skillet, a heatproof rubber or silicone spatula, and a small bowl or ramekin to beat the eggs.
Step 2: Crack and beat the eggs
Crack the 3 eggs into the bowl and beat with a fork or whisk for 15–20 seconds until yolks and whites are uniformly blended and slightly frothy; this aeration helps a tender texture. Scrape the sides so there are no streaks of unmixed egg.

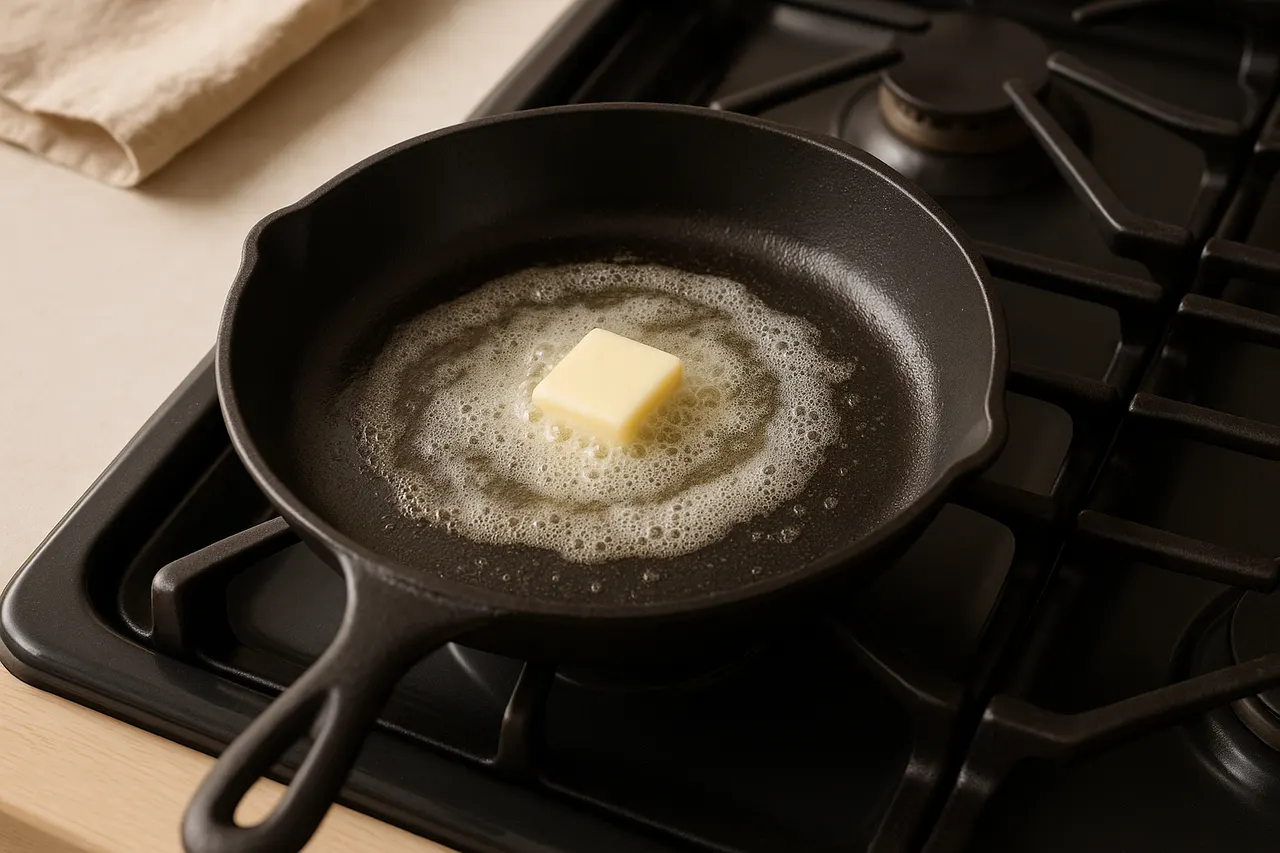
Step 3: Heat the pan gently
Place the empty 8-inch skillet over medium-low heat for about 1 minute until warm but not smoking. Add the butter and let it melt and foam for 10–15 seconds; the foam indicates the water has evaporated and the fat is ready to cook evenly.
Step 4: Add eggs and start stirring
Pour the beaten eggs into the skillet and immediately start stirring with the spatula, making small circular motions across the surface for 20–30 seconds. Stirring breaks up curds and produces small soft curds that build a creamy interior.

Step 5: Let eggs set gently
Stop stirring when the eggs are mostly set but still glossy and slightly runny on top, about 10–20 more seconds depending on heat. Turning off the heat a little early prevents overcooking from residual pan heat and keeps the omelette tender.

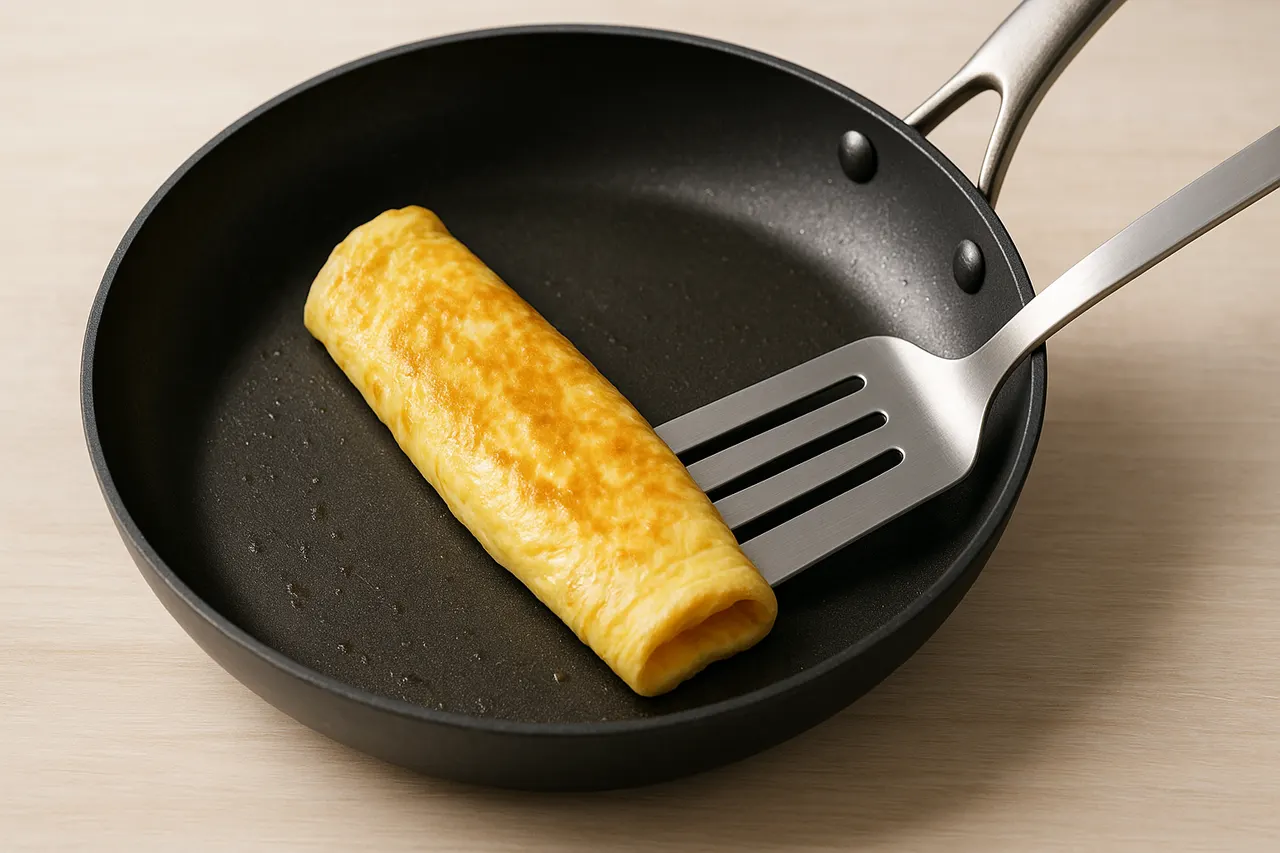
Step 6: Shape and fold the omelette
Tilt the pan away from you and use the spatula to fold one third toward the center, then roll or fold the remaining portion under itself into a cylinder or tri-fold. This shaping traps steam and creates the classic smooth exterior.
Step 7: Slide onto plate and finish
Gently slide the omelette onto a warm plate seam-side down; brush with a small pat (about 1/2 teaspoon) of butter and sprinkle with salt and pepper. Serve immediately — the omelette will relax and set in 30–60 seconds.

- Use room-temperature eggs for more even cooking; take eggs out 10–15 minutes before cooking.
- Maintain medium-low heat — too hot will brown or toughen the omelette quickly.
- If adding fillings (cheese, herbs), use small amounts and add just before folding so they melt without making the omelette heavy.
- Practice the stirring motion with an empty pan to get comfortable with wrist movement and timing.
- Use clarified butter or a neutral oil if you want slightly higher smoke point; unsalted butter gives best flavor.
- Wipe the pan clean and re-oil between attempts to learn how different heats affect the result.
- Do not cook over high heat; the omelette will brown and become rubbery if the pan is too hot.
- Avoid overfilling with vegetables or meats — excess moisture will prevent proper setting and cause a broken omelette.
- Handle the hot pan and spatula carefully to prevent burns; use an oven mitt or towel when tilting the skillet.
Was this guide helpful?
More Food & Entertaining guides
How to make stovetop shakshuka with tender eggs and balanced tomato sauce
Shakshuka is a comforting North African–style skillet of eggs poached in a spiced tomato sauce. This guide walks you through building a balanced sauce and gently cooking tender eggs on the stovetop so yolks stay silky while the sauce is bright and flavorful.
How to make homemade sourdough starter and maintain regular feedings
Making a sourdough starter is a simple, rewarding kitchen project that captures wild yeast and beneficial bacteria to leaven bread. With just flour, water, and a little patience you can build a lively culture and keep it healthy with regular feedings. Follow the step-by-step routine below to create and maintain a starter that will power many loaves.
How to assemble and store layered salads so they don’t get soggy before eating
Layered salads are a colorful, make-ahead way to serve a crowd, but soggy ingredients can ruin the texture. With a few simple construction and storage strategies you can keep greens crisp and dressings separated for 24–72 hours. Follow these steps to assemble jars or bowls that travel well and taste fresh when served.