How to make a quick pan sauce after cooking meat
A quick pan sauce is an easy way to turn browned meat into a restaurant-style dish in minutes. Using the browned bits and fond left in the skillet, a few liquids, and a little butter or cream, you can make a glossy, flavorful sauce in 3–6 minutes. Follow the steps below to build a balanced sauce that complements beef, pork, chicken, or lamb.
Step 1: Remove meat and rest
Transfer the cooked meat to a plate and tent loosely with foil for 5–10 minutes. Resting preserves juices and frees the hot pan to concentrate fond for your sauce without overcooking the protein.
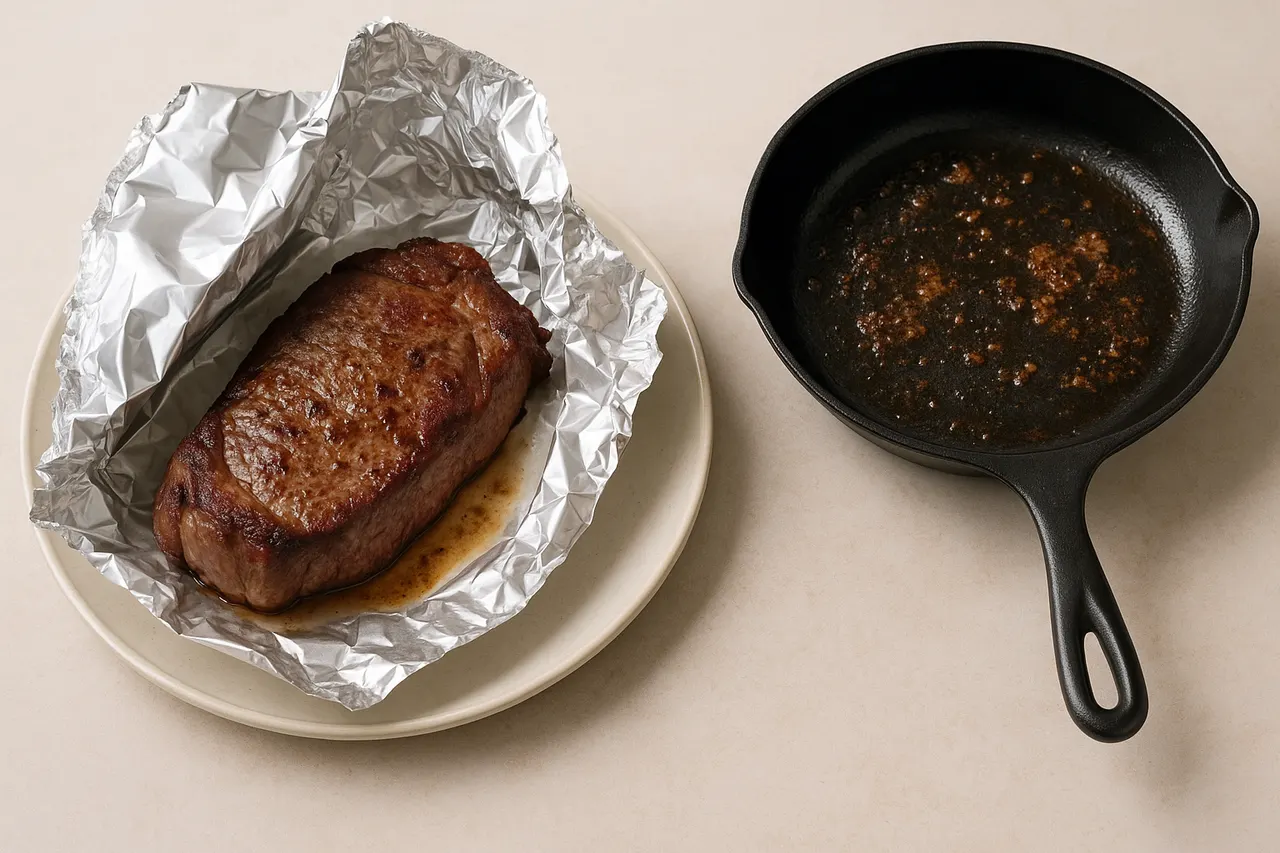
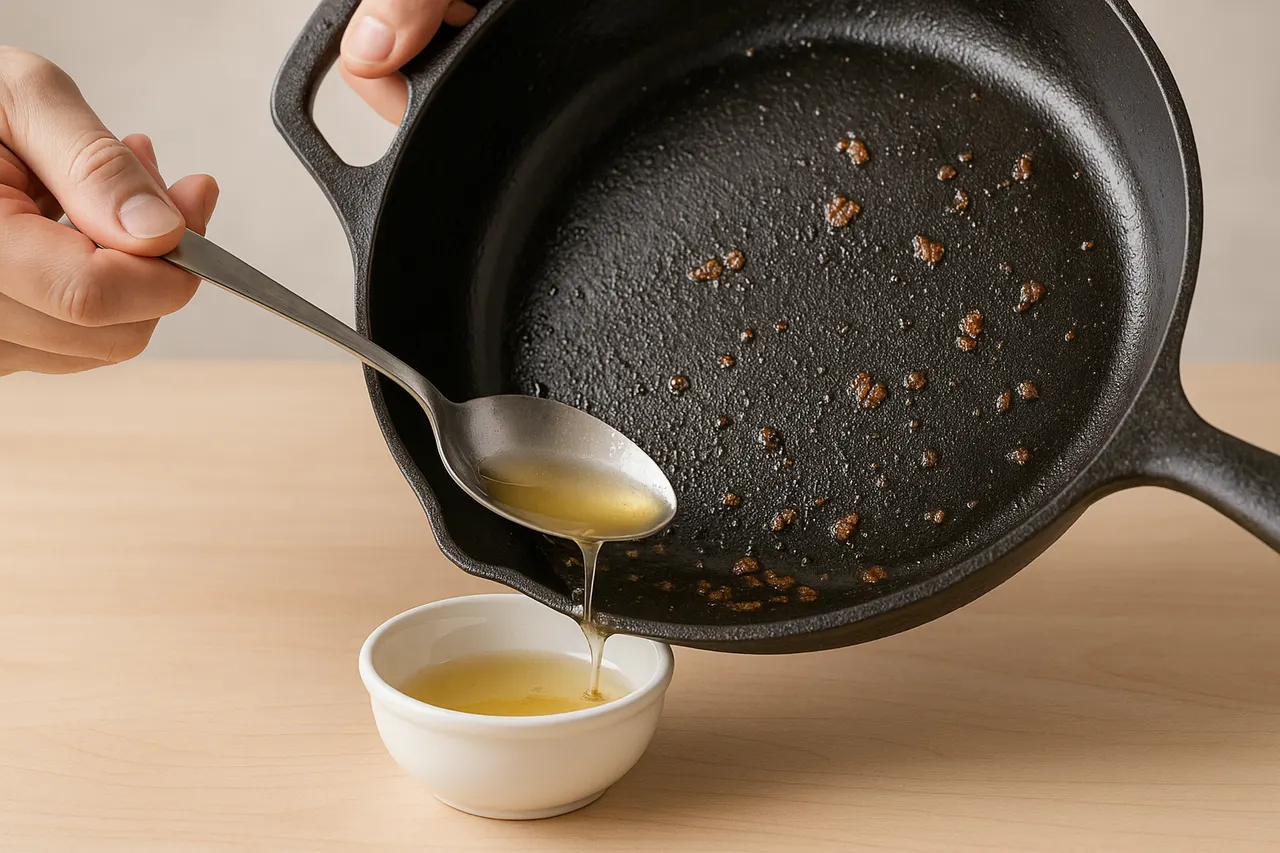
Step 2: Pour off excess fat
Tilt the pan and remove most fat with a spoon or pour into a heatproof container, leaving about 1–2 tablespoons of fat and fond in the pan. That small amount carries flavor but prevents a greasy sauce.
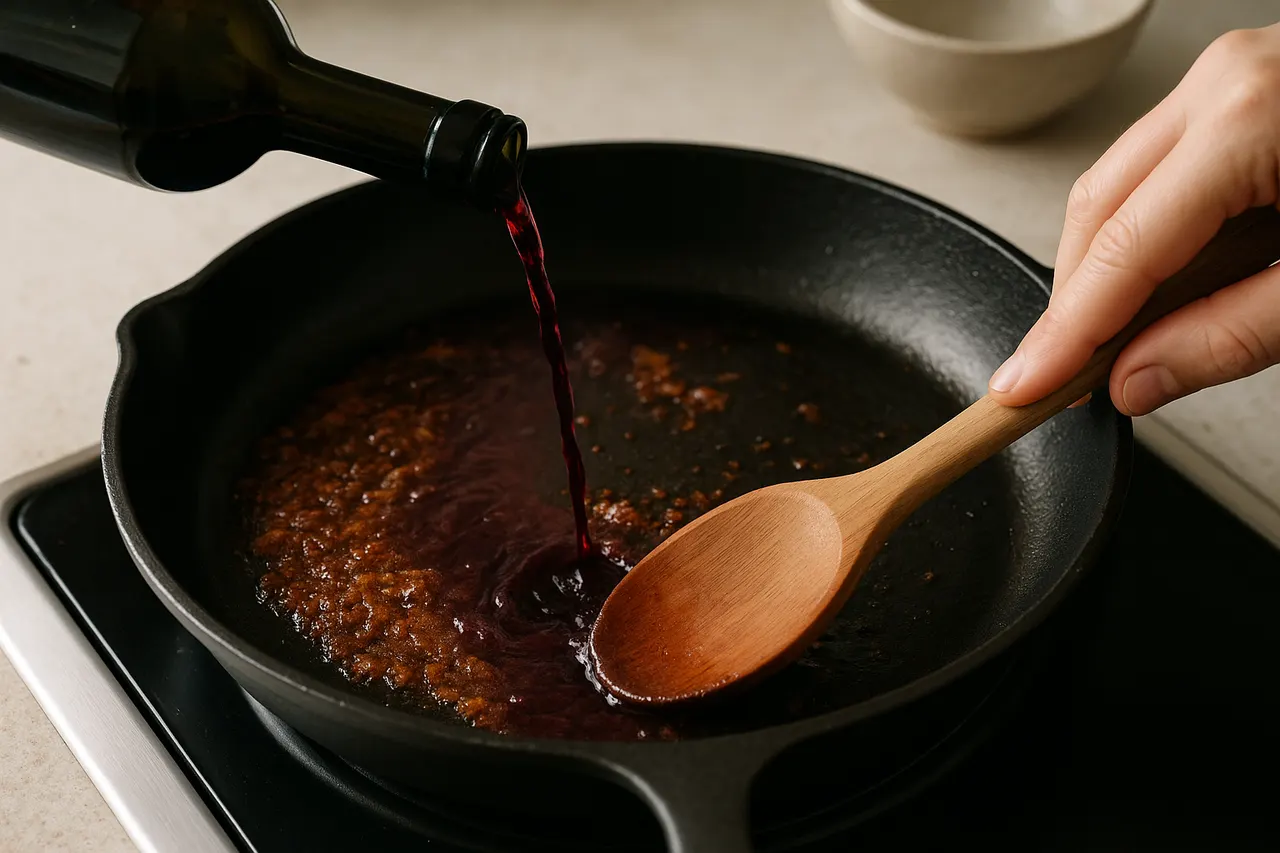
Step 3: Deglaze with 30–60 ml liquid
With pan over medium-high heat, add 30–60 ml (2–4 tablespoons) of wine, stock, or vermouth and immediately scrape the bottom with a wooden spoon to lift browned bits. Deglazing dissolves concentrated flavors into the sauce base.
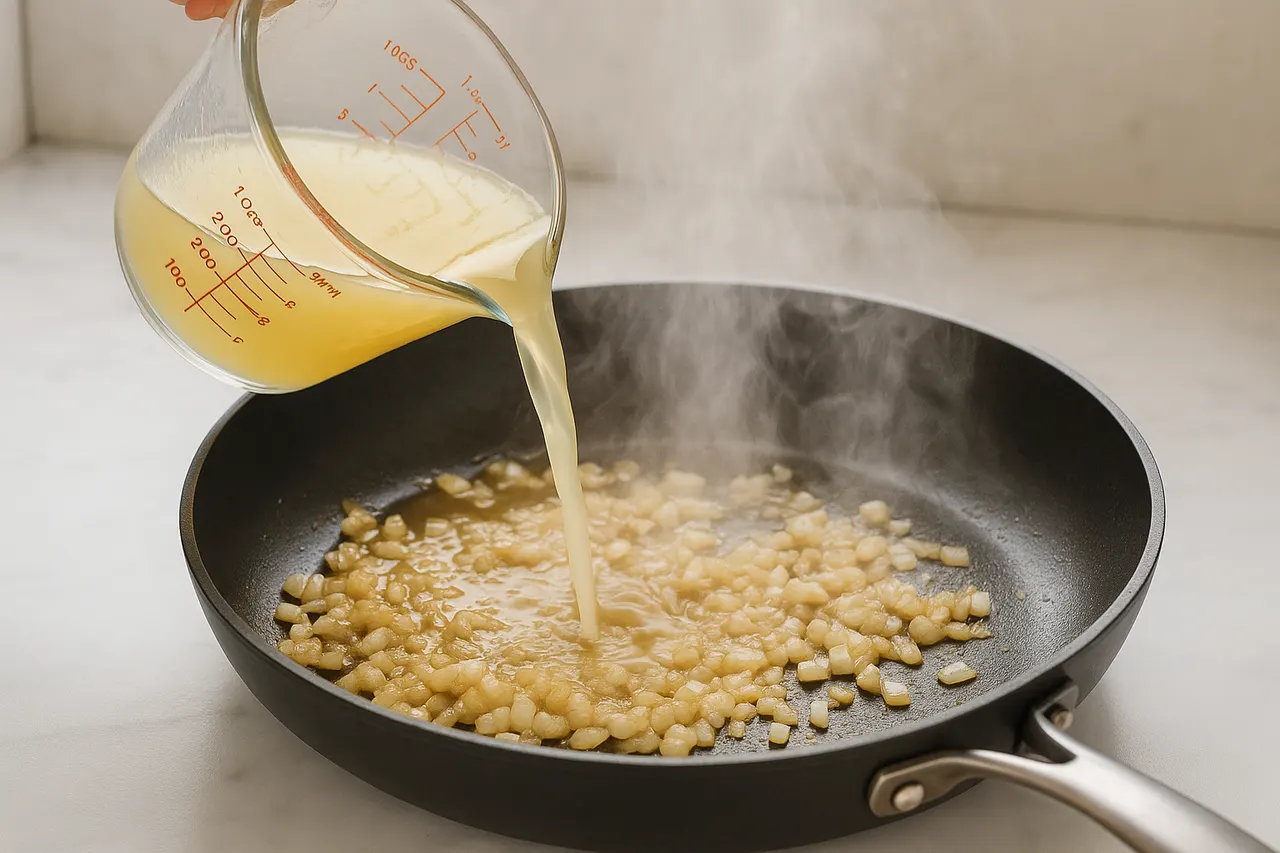
Step 4: Add 60–120 ml stock or cream
Pour in 60–120 ml (1/4–1/2 cup) of chicken, beef stock, or single cream depending on richness desired; simmer 1–3 minutes to reduce slightly. This builds body and lets flavors meld without diluting fond.
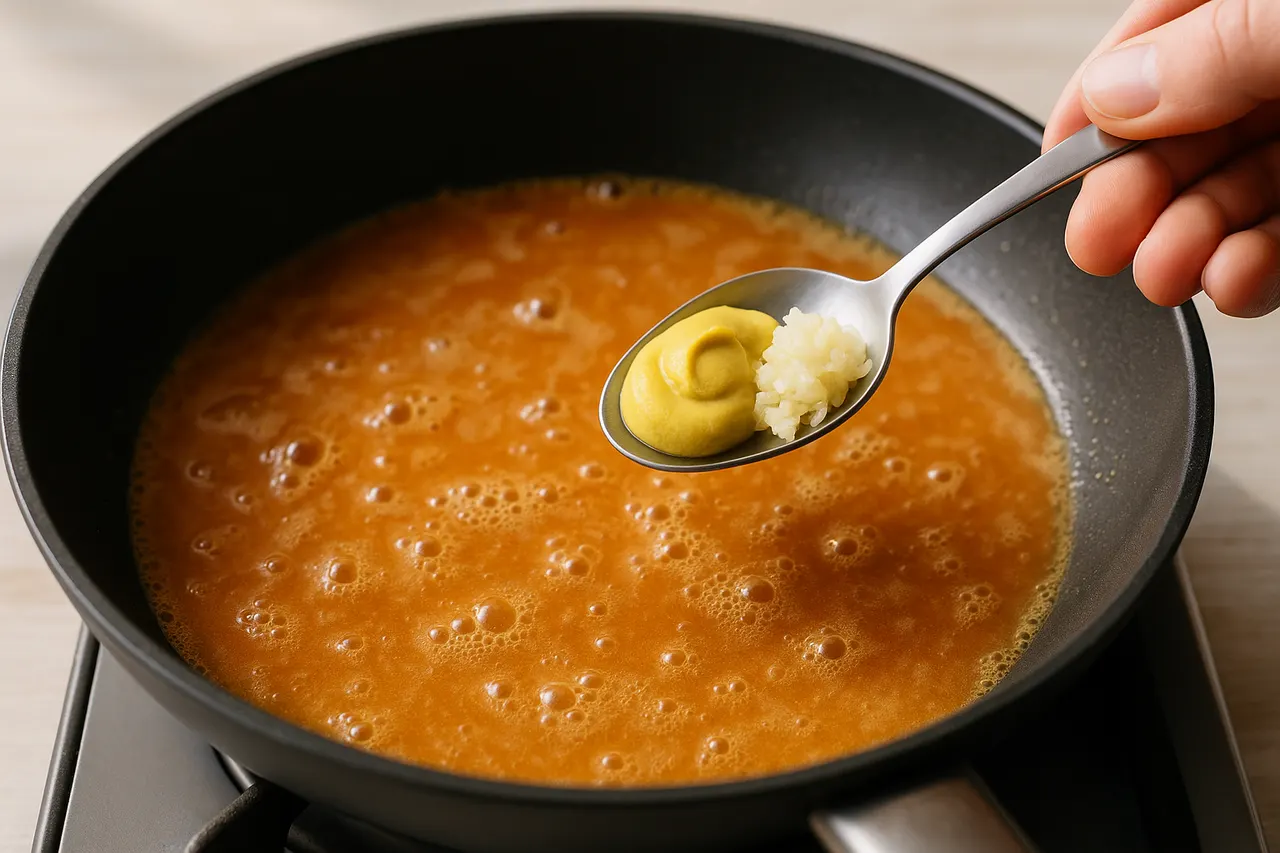
Step 5: Season and aromatics
Stir in 1 teaspoon Dijon mustard or 1 teaspoon soy sauce and 1 small minced garlic clove or 1 teaspoon fresh thyme; cook 30–60 seconds to bloom flavors. Acid and aromatics brighten and balance the savory base.
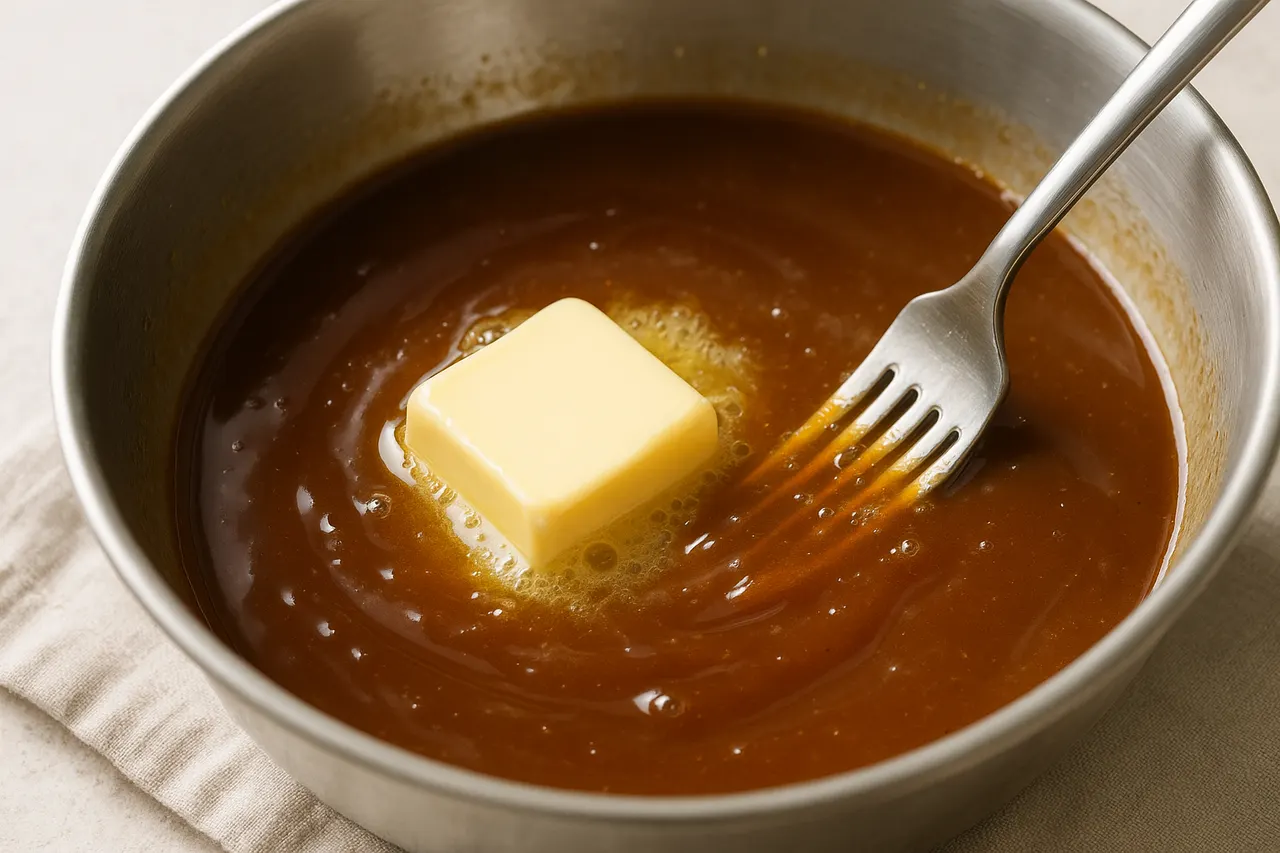
Step 6: Finish with butter or cream
Remove from heat and whisk in 1 tablespoon cold butter or 1–2 tablespoons cream until glossy and slightly thickened; this enriches and stabilizes the sauce. Emulsifying off-heat prevents breaking and gives a silky texture.
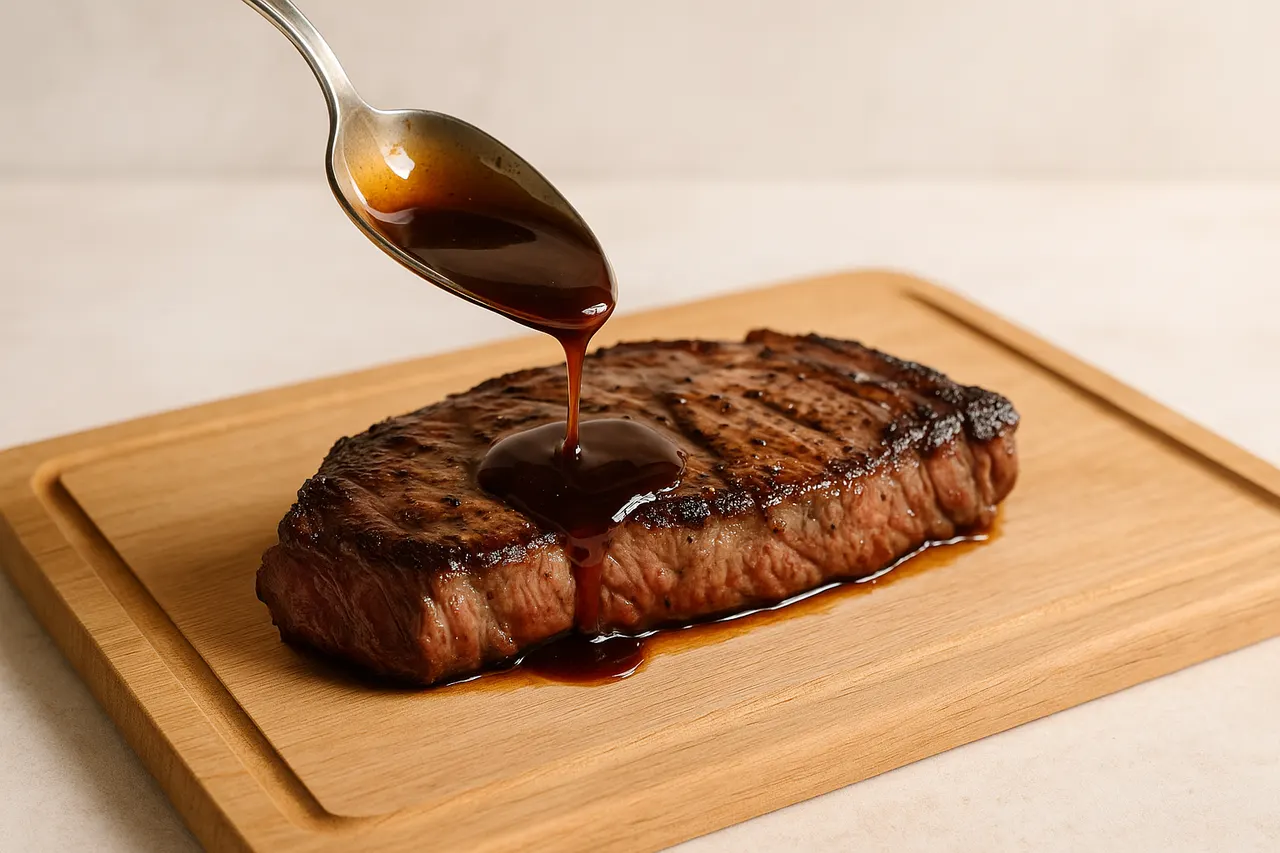
Step 7: Taste and adjust then serve
Taste and adjust with 1–2 teaspoons lemon juice or 1/4 teaspoon salt and pepper as needed, then spoon over the rested meat. Small adjustments lift the sauce and ensure it complements the meat rather than overpowering it.
- Use a stainless or cast-iron pan for best fond formation and heat retention.
- If using wine, choose a dry white for chicken/fish or a dry red for beef; avoid sugary wines that can burn.
- For a quick herb boost, stir in 1 teaspoon chopped parsley or chives at the end for freshness.
- To thicken slightly without cream, simmer an extra 1–2 minutes or whisk in 1/4 teaspoon cornstarch dissolved in 1 teaspoon cold water.
- If sauce tastes flat, add 1/2 teaspoon soy sauce or Worcestershire sauce for umami depth.
- Make extra sauce: double liquids and reduce to desired concentration; it keeps 2 days refrigerated in an airtight container.
- Never pour water on a hot pan with hot oil — it can splatter dangerously; deglaze carefully and use long-handled utensils.
- Don’t let alcohol flame without control; if you want to flambé, clear the area and keep a lid nearby to smother flames.
- Avoid overheating cream or butter which can separate; remove from heat before fully incorporating fatty finishes.
- If meat was cooked to unsafe temperatures, do not use pan drippings as they may contain harmful bacteria; use fresh stock instead.
Was this guide helpful?
More Food & Entertaining guides
How to make stovetop shakshuka with tender eggs and balanced tomato sauce
Shakshuka is a comforting North African–style skillet of eggs poached in a spiced tomato sauce. This guide walks you through building a balanced sauce and gently cooking tender eggs on the stovetop so yolks stay silky while the sauce is bright and flavorful.
How to make homemade sourdough starter and maintain regular feedings
Making a sourdough starter is a simple, rewarding kitchen project that captures wild yeast and beneficial bacteria to leaven bread. With just flour, water, and a little patience you can build a lively culture and keep it healthy with regular feedings. Follow the step-by-step routine below to create and maintain a starter that will power many loaves.
How to assemble and store layered salads so they don’t get soggy before eating
Layered salads are a colorful, make-ahead way to serve a crowd, but soggy ingredients can ruin the texture. With a few simple construction and storage strategies you can keep greens crisp and dressings separated for 24–72 hours. Follow these steps to assemble jars or bowls that travel well and taste fresh when served.