How to make creamy risotto without it becoming gluey
Creamy risotto comes from gentle technique more than heavy cream. With the right rice, patient stirring, and careful liquid control you can achieve rich, silky grains that stay distinct rather than sticky glue.
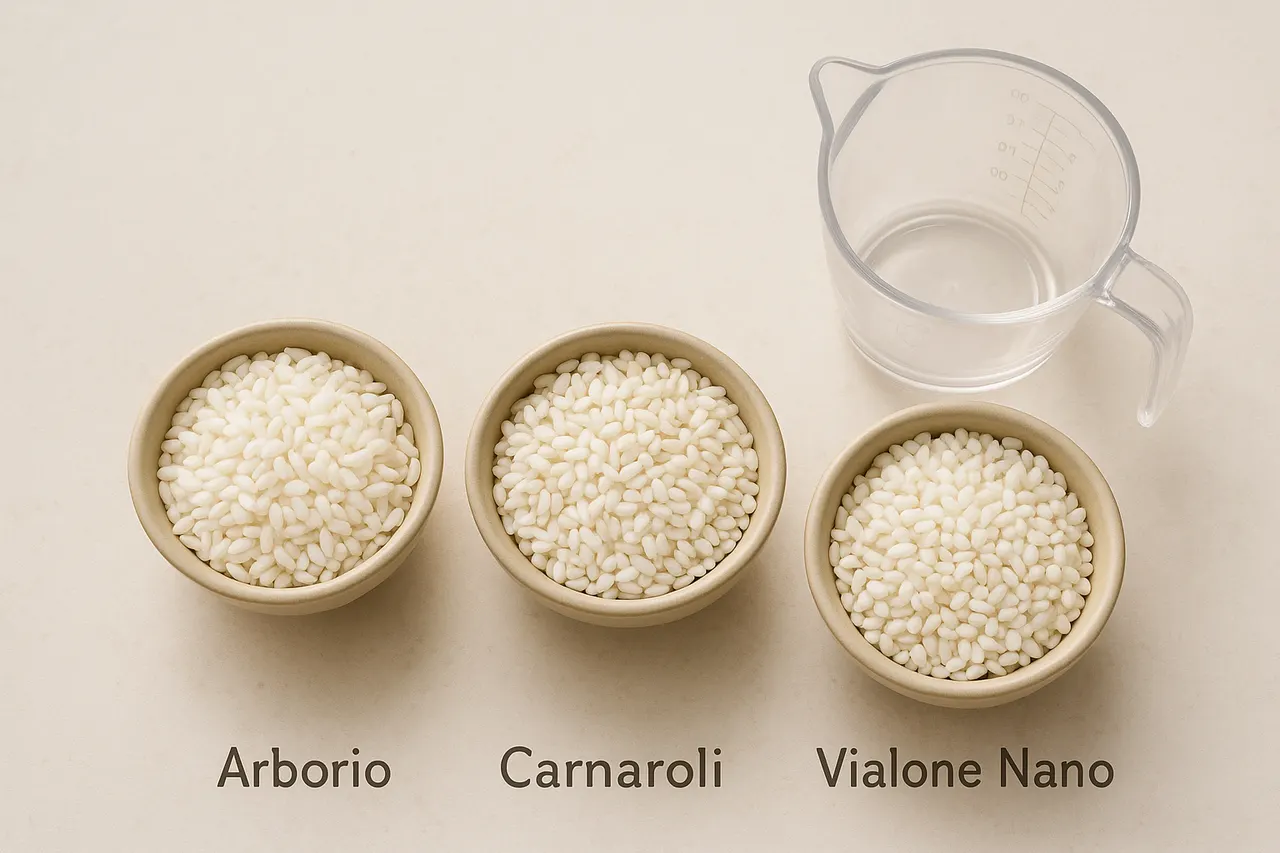
Step 1: Choose the right rice
Use 1 1/2 to 2 cups of arborio, carnaroli, or vialone nano for 4 servings. These varieties have the right starch profile: carnaroli and vialone nano are less prone to turning gluey than generic short-grain rice. Measure by volume so you control the rice-to-liquid ratio precisely.
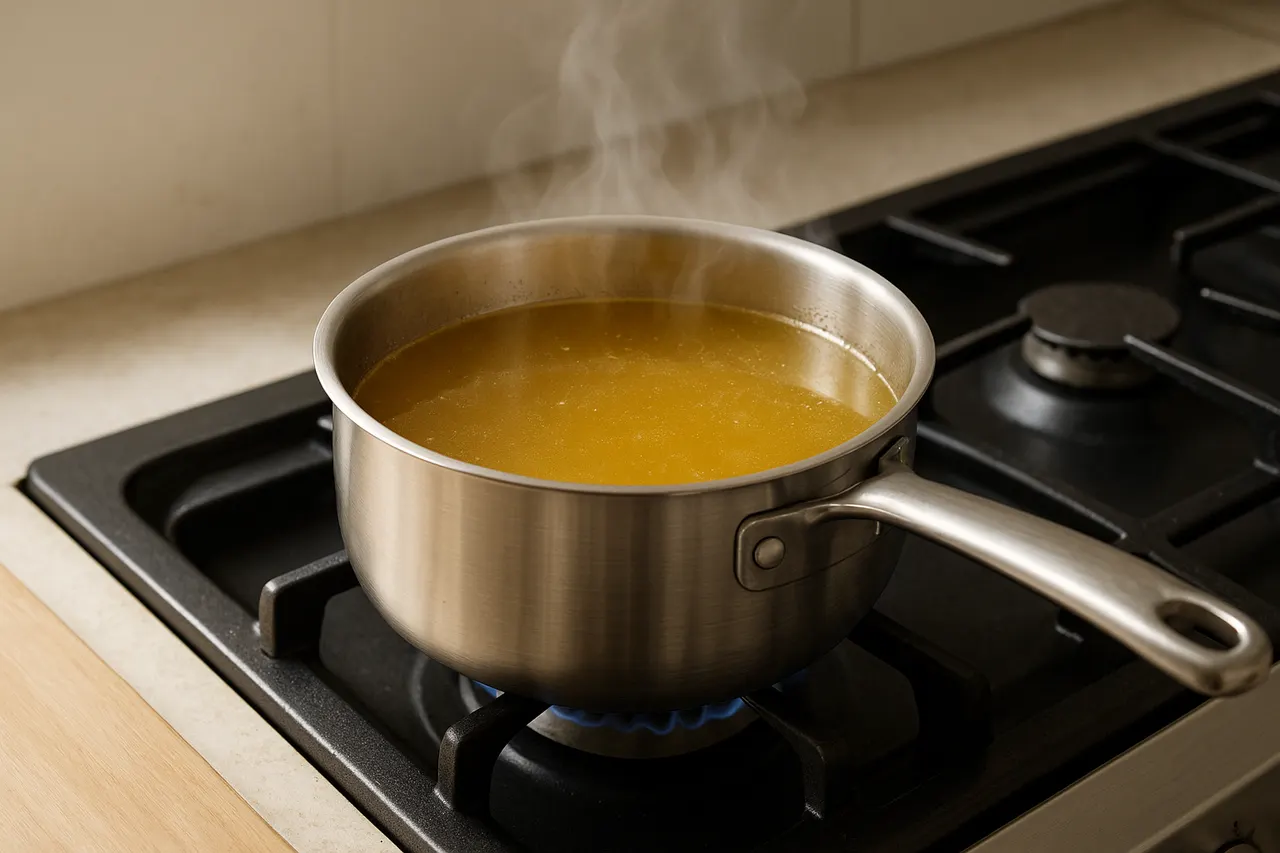
Step 2: Prepare flavorful warm stock
Heat 6 to 7 cups of low-sodium chicken or vegetable stock and keep it at a gentle simmer in a separate saucepan. Adding warm liquid keeps the cooking temperature steady and prevents the rice from seizing up and releasing excess starch all at once.
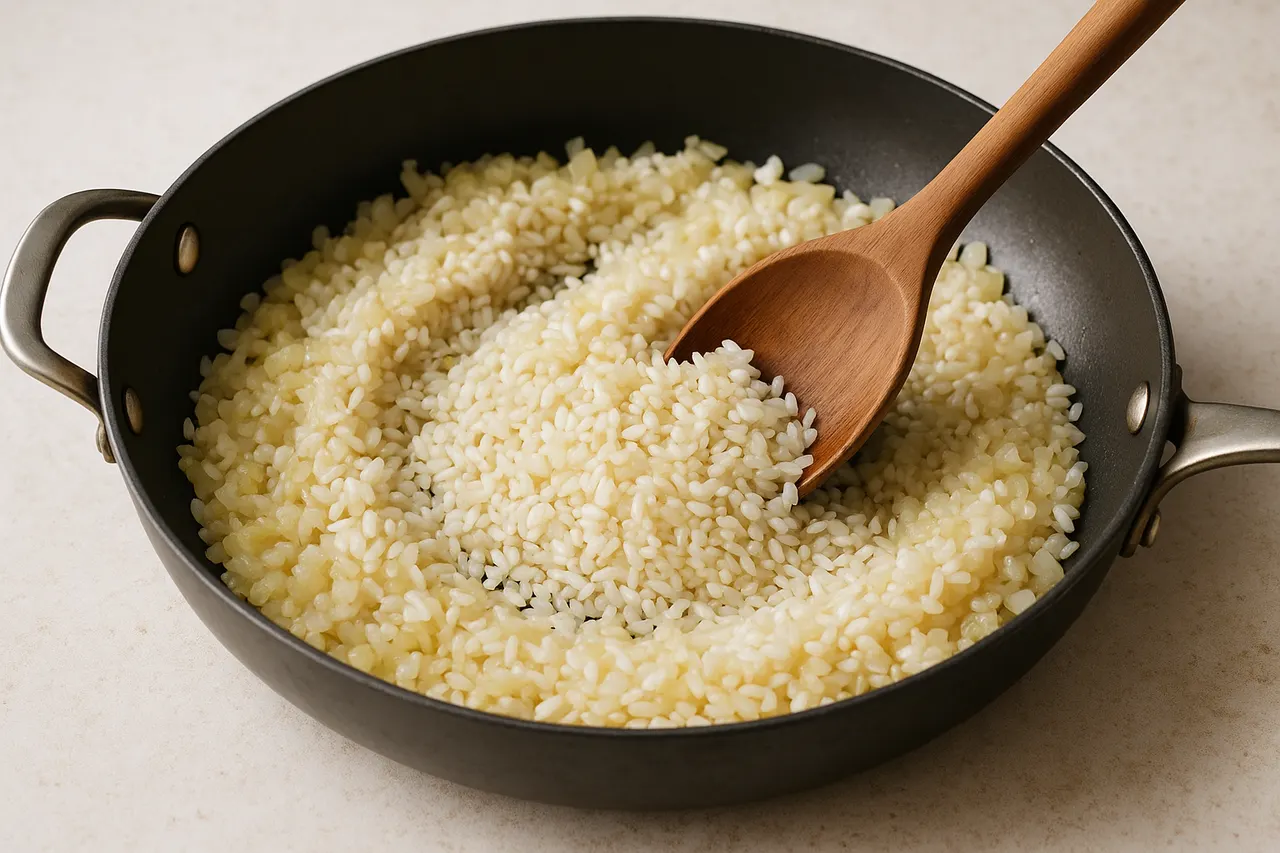
Step 3: Sauté aromatics and toast rice
In a wide heavy pan, melt 2 tablespoons butter and 1 tablespoon olive oil over medium heat. Sauté 1 small chopped onion or 2 shallots until translucent (3–4 minutes), then add the rice and toast for 1–2 minutes until edges look translucent. Toasting seals grains slightly and helps maintain texture.
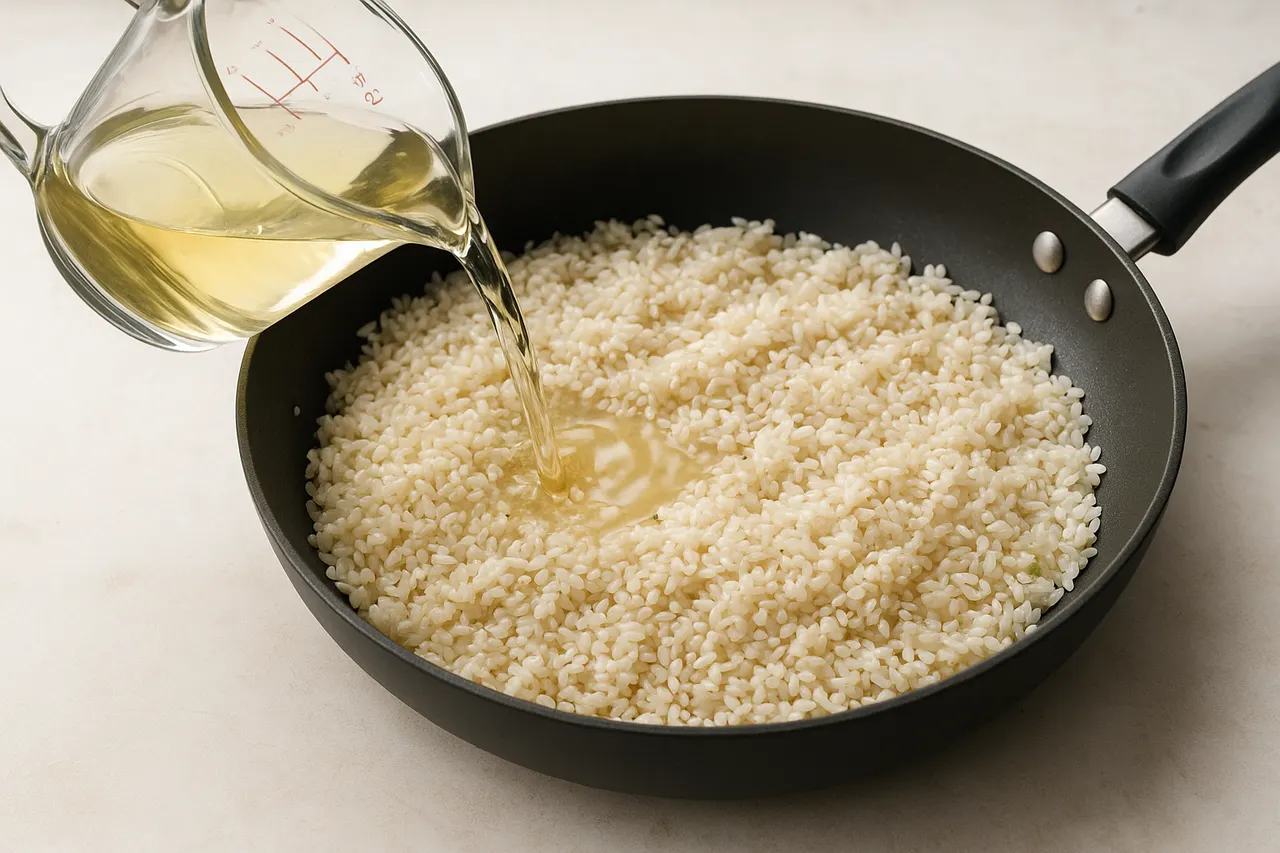
Step 4: Deglaze with measured wine
Pour 1/2 to 3/4 cup dry white wine and stir until mostly absorbed, about 1–2 minutes. The alcohol helps separate starches and adds acidity to balance creaminess; don’t skip this step unless you prefer a different acid like 1 tablespoon lemon juice later.
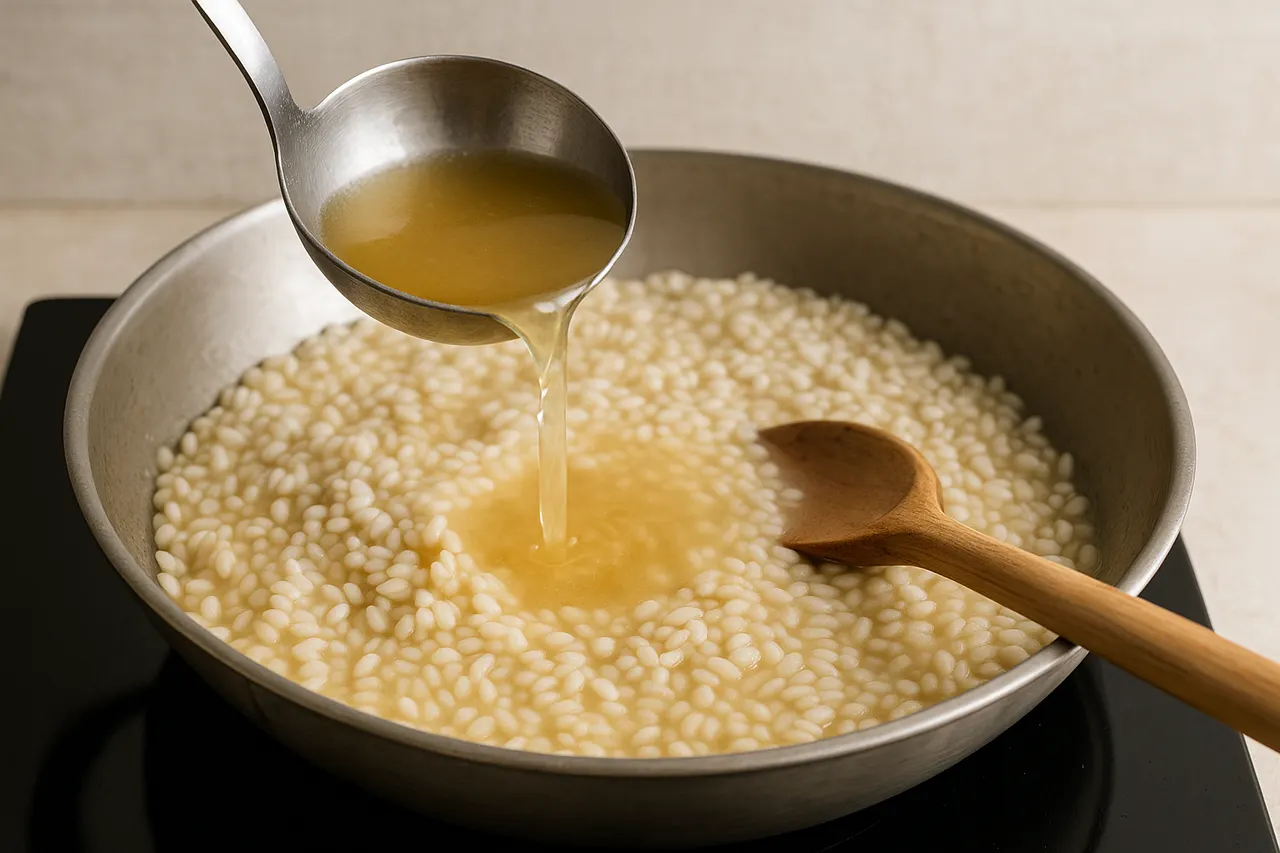
Step 5: Add warm stock gradually
Ladle in 1/2 cup to 3/4 cup warm stock at a time, stirring gently until the liquid is nearly absorbed before adding more. Total cooking time should be 18–20 minutes for arborio; aim for al dente with a slight bite. Small additions control starch release and prevent gluey overcooking.
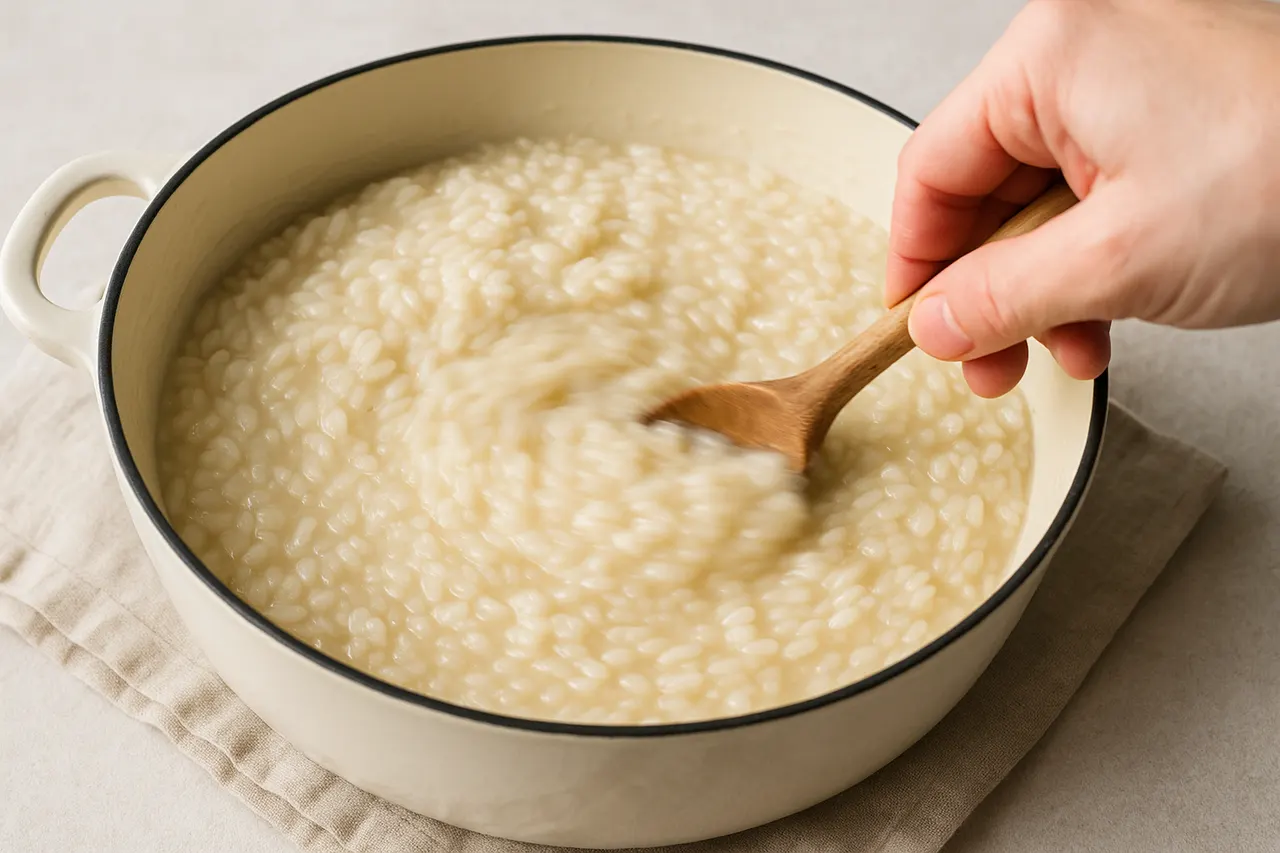
Step 6: Stir gently, not constantly
Stir every 20–30 seconds rather than nonstop; about 10–15 gentle stirs per addition is enough. Vigorous continuous stirring can break grains and force excess starch out, while occasional stirring keeps the surface moving and prevents sticking.
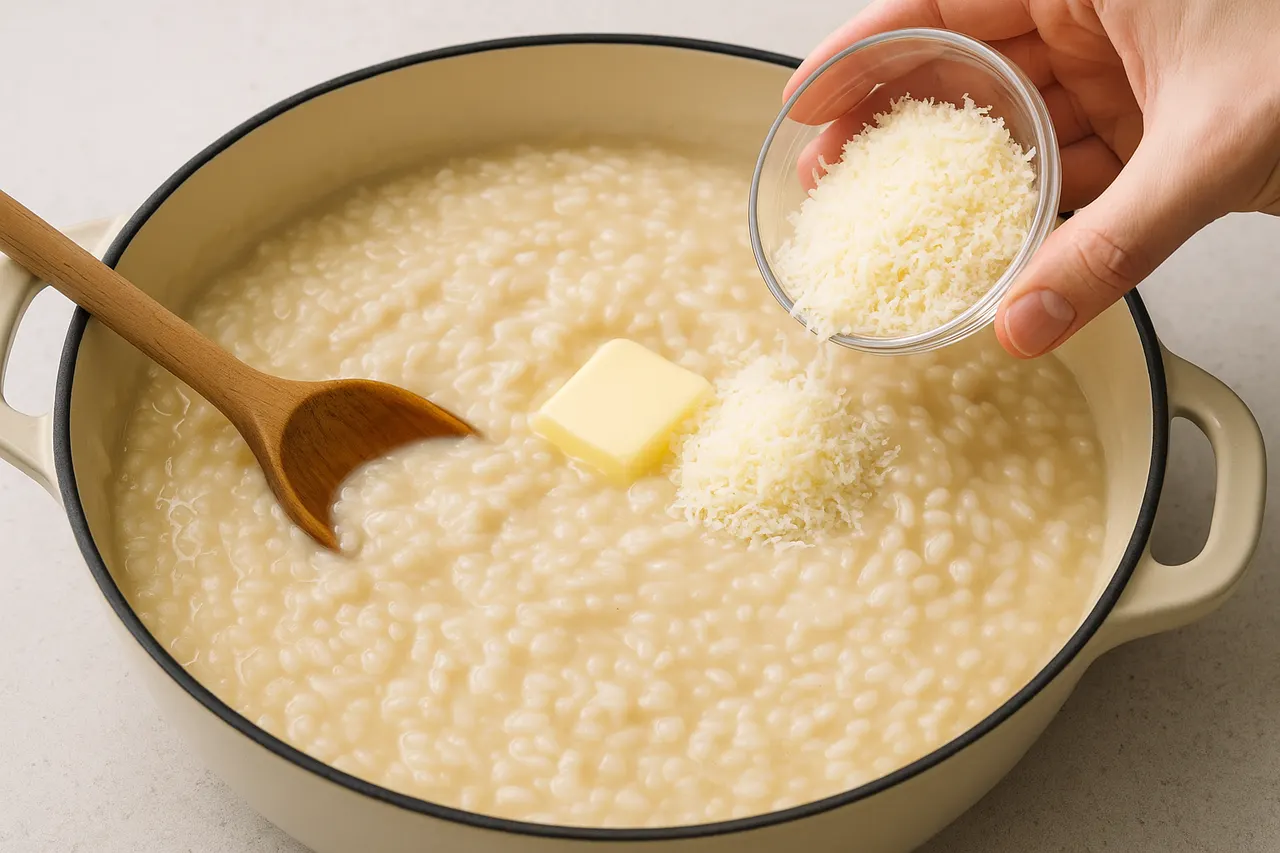
Step 7: Finish with fat and timing
When rice is just cooked, remove from heat and stir in 2 tablespoons butter and 1/2 cup freshly grated Parmesan off heat; rest for 1 minute. This enfolds fat around grains for creaminess without overcooking. Serve immediately—risotto firms as it cools, so timing matters.
- Use a wide, shallow pan so more surface area evaporates liquid evenly.
- Rinse only if you accidentally bought prewashed rice; normally do not rinse starchy risotto rice.
- If stock is too salty, dilute with 1/2 cup water to avoid over-seasoning late in cooking.
- Test doneness at 16 minutes and adjust final stock additions to avoid overcooking.
- For extra silkiness, finish with 1–2 tablespoons cream or a spoonful of mascarpone off heat.
- Keep a small extra bowl of hot stock nearby so you don’t cool the pan while fetching more.
- Use a thermometer: maintain pan temperature around 180–200°F (82–93°C) for steady cooking.
- Do not dump all the stock in at once—this causes rapid starchy release and a gluey texture.
- Avoid boiling aggressively; a rolling boil breaks grains and forces starch out, use a gentle simmer instead.
- Do not overcook past al dente; each additional minute can push risotto from creamy to gummy.
- Avoid adding cold butter or cheese straight from the fridge; cool ingredients can shock the rice and affect texture.
Was this guide helpful?
More Food & Entertaining guides
How to make stovetop shakshuka with tender eggs and balanced tomato sauce
Shakshuka is a comforting North African–style skillet of eggs poached in a spiced tomato sauce. This guide walks you through building a balanced sauce and gently cooking tender eggs on the stovetop so yolks stay silky while the sauce is bright and flavorful.
How to make homemade sourdough starter and maintain regular feedings
Making a sourdough starter is a simple, rewarding kitchen project that captures wild yeast and beneficial bacteria to leaven bread. With just flour, water, and a little patience you can build a lively culture and keep it healthy with regular feedings. Follow the step-by-step routine below to create and maintain a starter that will power many loaves.
How to assemble and store layered salads so they don’t get soggy before eating
Layered salads are a colorful, make-ahead way to serve a crowd, but soggy ingredients can ruin the texture. With a few simple construction and storage strategies you can keep greens crisp and dressings separated for 24–72 hours. Follow these steps to assemble jars or bowls that travel well and taste fresh when served.