How to roast a whole chicken in the oven
Roasting a whole chicken is an easy, satisfying way to feed a family and build confidence in the kitchen. With simple seasoning and an oven, you can get crisp skin, juicy meat, and flexible leftovers for salads or sandwiches. Follow these clear steps and timings to get a reliably delicious roast.
Step 1: Preheat the oven
Set the oven to 425°F (220°C) at least 20 minutes before cooking so the cavity and pan heat evenly; a hot start encourages crispy skin. Place a rack in the center position to allow air circulation around the bird.

Step 2: Prepare the chicken
Remove giblets and any packaging, then pat the chicken dry inside and out with paper towels; removing surface moisture helps browning. Let the chicken sit at room temperature for 20–30 minutes to promote even cooking.

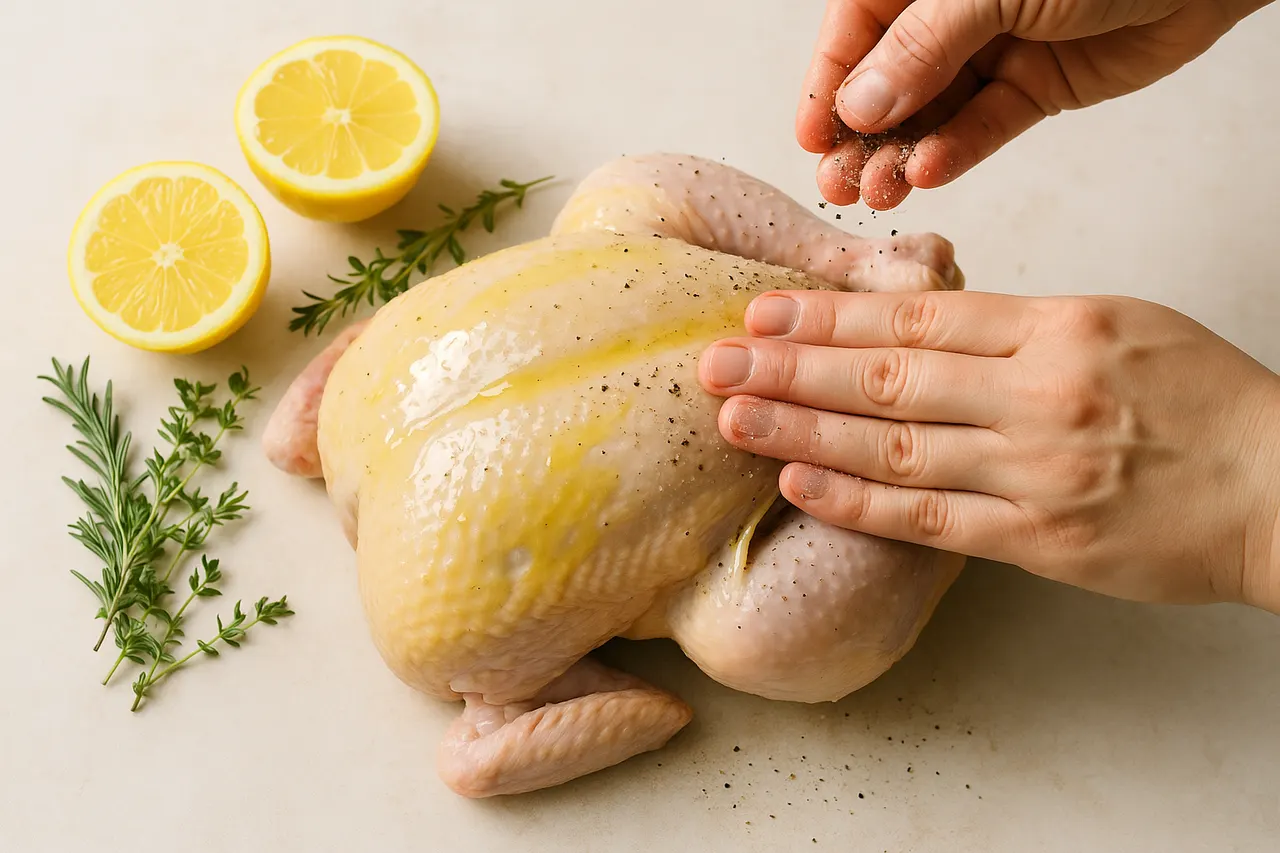
Step 3: Season simply and effectively
Rub 1–2 tablespoons olive oil or melted butter over the skin, then season with 1 teaspoon coarse salt and 1/2 teaspoon black pepper per pound of chicken; add 1–2 teaspoons dried herbs or a handful of fresh herbs and a halved lemon inside the cavity for flavor. Tuck the wing tips under and tie the legs with kitchen twine for even roasting.
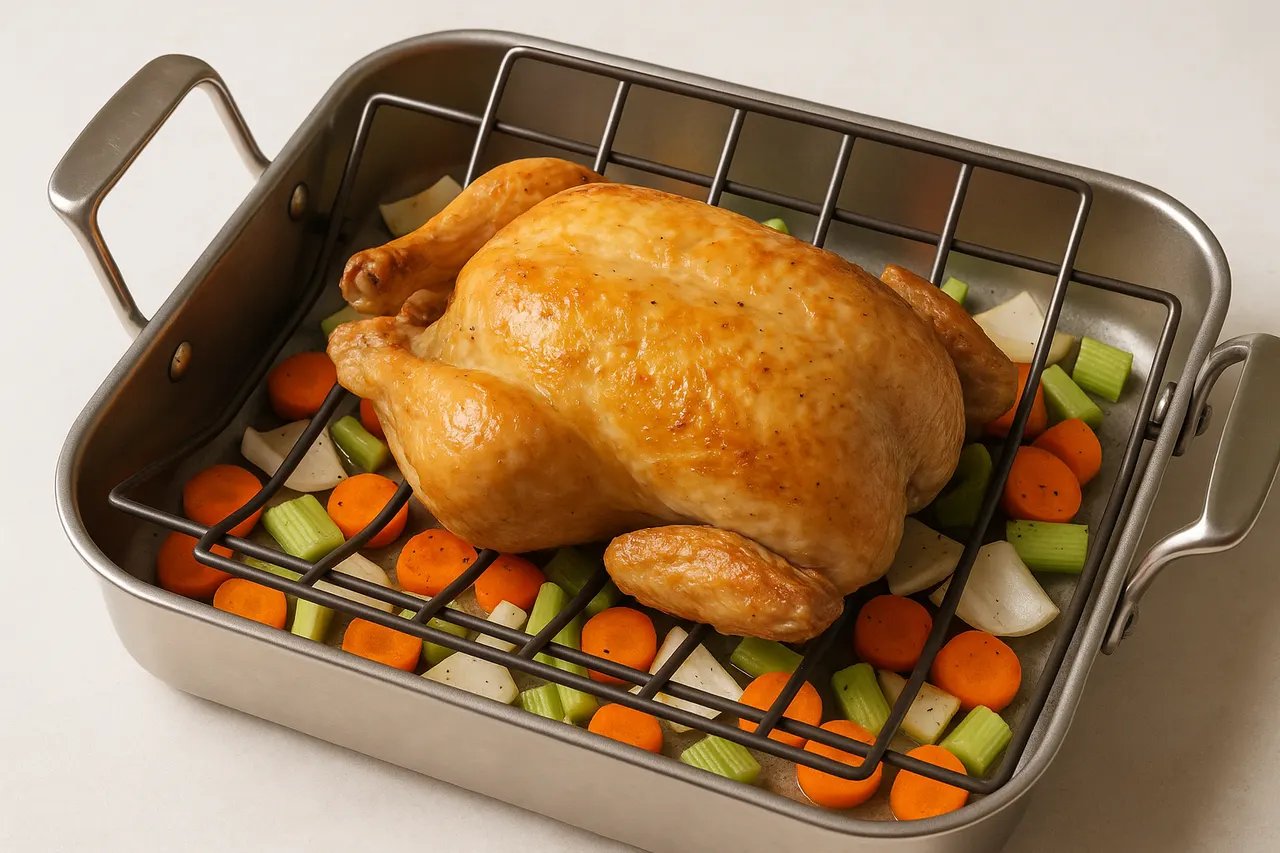
Step 4: Use a roasting pan or sheet
Place the chicken breast-side up on a shallow roasting pan, rimmed sheet pan, or ovenproof skillet; you can add a bed of chopped vegetables (1–2 carrots, 1 onion, 2 celery stalks) to flavor drippings. Elevating the chicken on a wire rack improves airflow and browning if you have one.
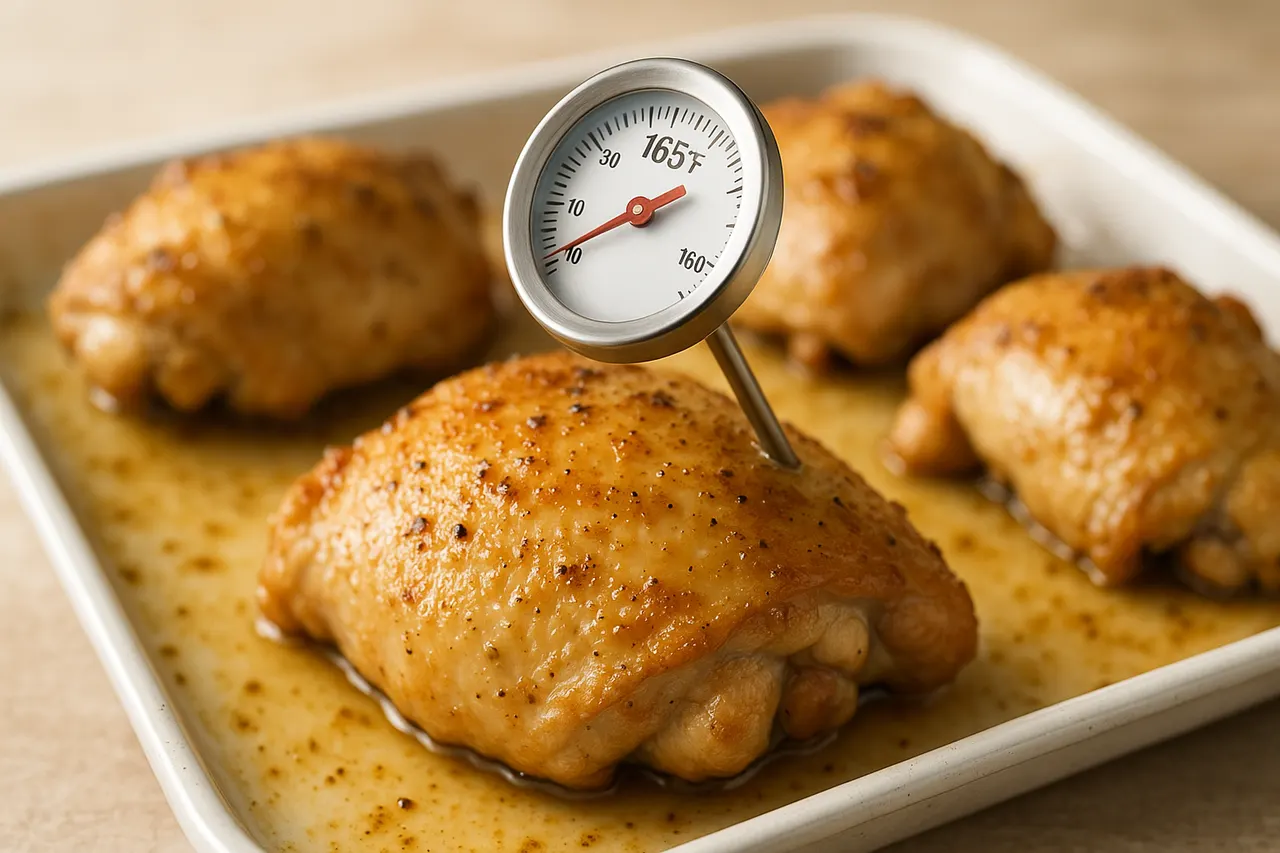
Step 5: Roast to temperature, not just time
Cook at 425°F for 15 minutes, then reduce heat to 375°F (190°C) and continue roasting about 15 minutes per pound until the thickest part of the thigh reaches 165°F (74°C). For a 4-pound chicken expect roughly 1 hour 15 minutes total, but rely on a thermometer for safety and doneness.
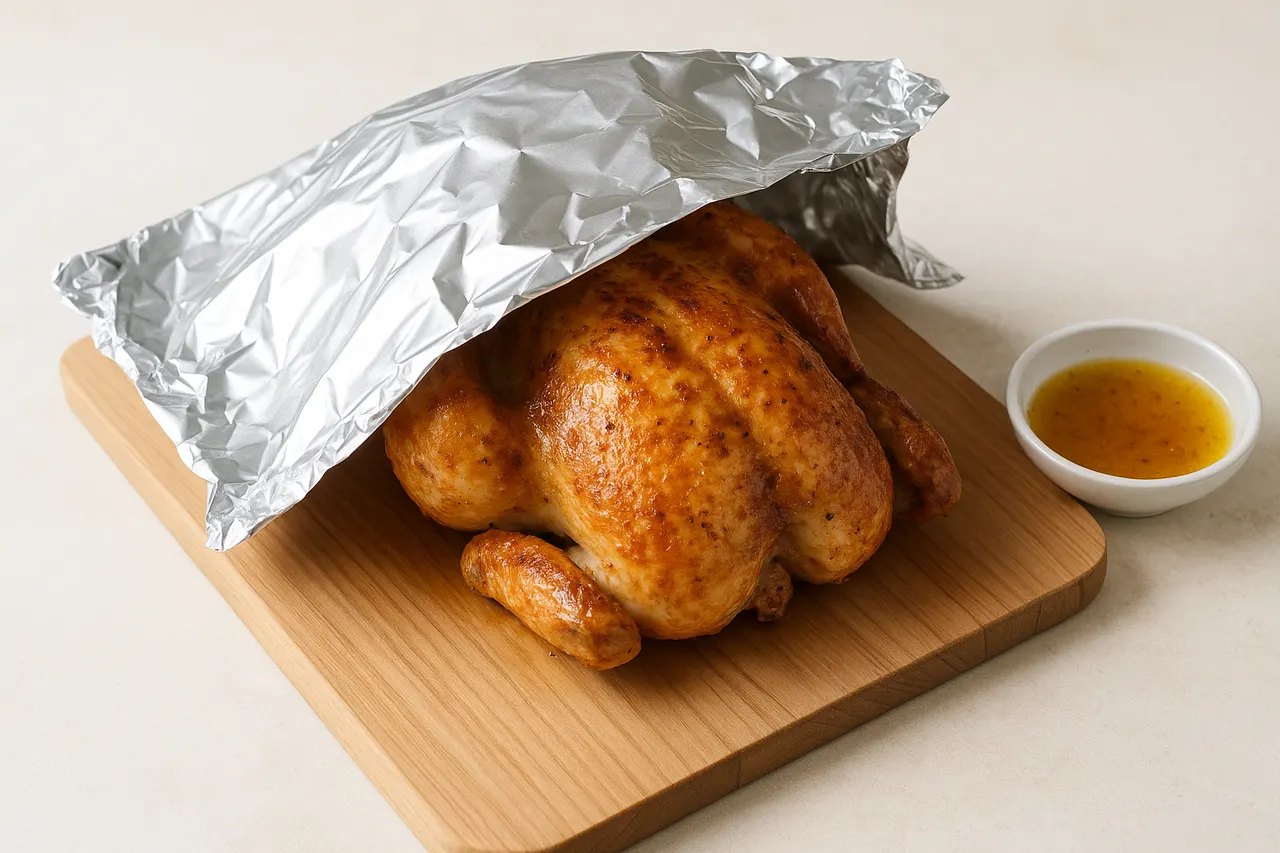
Step 6: Rest before carving
Transfer the chicken to a cutting board and tent loosely with foil; rest for 10–15 minutes so juices redistribute and the meat stays moist when carved. Reserve pan juices for gravy or spoon over sliced portions to add moisture and flavor.
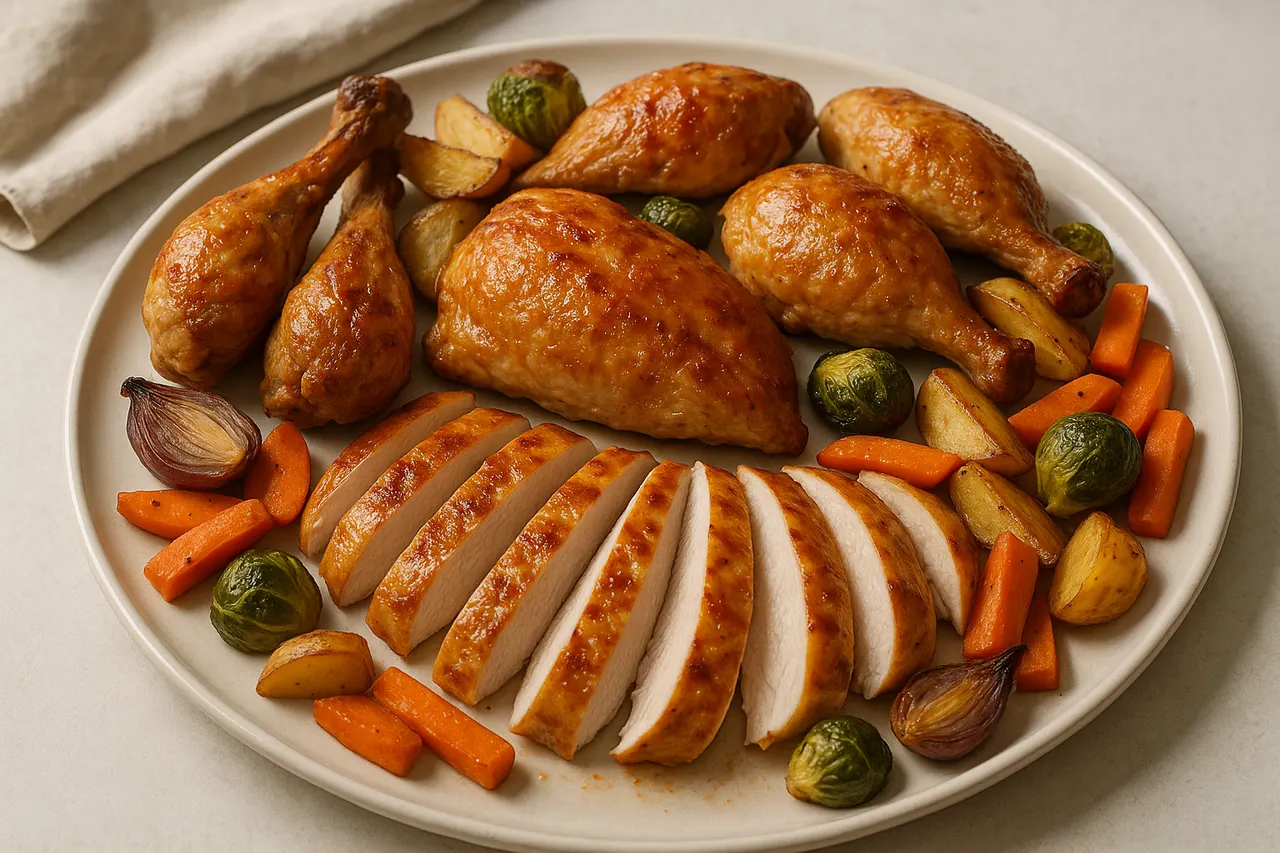
Step 7: Carve and serve
Start by removing the legs and thighs, then the wings, and slice the breast against the grain into 1/4–1/2-inch slices for tenderness. Serve with roasted vegetables and any collected juices; refrigerate leftovers within 2 hours and use within 3–4 days.
- Use a digital instant-read thermometer for accuracy; check temperature in the thickest part of the thigh, avoiding bone.
- Patting the skin very dry and applying a light coating of oil or butter helps achieve golden, crispy skin.
- If the skin browns too quickly, tent the chicken loosely with foil and continue cooking until internal temperature is reached.
- Flavor variations: rub with garlic and lemon zest, or a spice blend of 1 teaspoon paprika, 1 teaspoon garlic powder, and 1 teaspoon dried thyme.
- Save pan drippings: deglaze the roasting pan with 1/2 cup white wine or stock over medium heat, then whisk in 1 tablespoon butter and 1 teaspoon flour for a quick gravy.
- Bring leftovers to 165°F when reheating for food safety; shredded chicken is great for tacos, salads, and soups.
- Allow the chicken to sit at room temperature no longer than 30 minutes before roasting to avoid bacterial risk.
- Always ensure the internal temperature reaches 165°F (74°C) in the thickest part of the thigh to prevent undercooking.
- Do not refreeze raw poultry that has been thawed in the refrigerator unless cooked first; follow safe thawing and storage practices.
- Handle hot pans and juices with care to avoid burns; use oven mitts and set the pan on a heatproof surface.
- Keep raw chicken and its juices away from ready-to-eat foods and clean surfaces and utensils with hot, soapy water to prevent cross-contamination.
Was this guide helpful?
More Food & Entertaining guides
How to make stovetop shakshuka with tender eggs and balanced tomato sauce
Shakshuka is a comforting North African–style skillet of eggs poached in a spiced tomato sauce. This guide walks you through building a balanced sauce and gently cooking tender eggs on the stovetop so yolks stay silky while the sauce is bright and flavorful.
How to make homemade sourdough starter and maintain regular feedings
Making a sourdough starter is a simple, rewarding kitchen project that captures wild yeast and beneficial bacteria to leaven bread. With just flour, water, and a little patience you can build a lively culture and keep it healthy with regular feedings. Follow the step-by-step routine below to create and maintain a starter that will power many loaves.
How to assemble and store layered salads so they don’t get soggy before eating
Layered salads are a colorful, make-ahead way to serve a crowd, but soggy ingredients can ruin the texture. With a few simple construction and storage strategies you can keep greens crisp and dressings separated for 24–72 hours. Follow these steps to assemble jars or bowls that travel well and taste fresh when served.