How to sear a steak to get a perfect crust
Searing a steak to get a perfect crust is about heat, technique, and timing more than fancy equipment. With a few reliable steps you can produce a deeply browned exterior and a juicy interior every time. Follow this friendly, practical guide to build confidence at the stove.
Step 1: Choose the right cut and thickness
Pick a steak 1 to 1.5 inches thick for predictable results — ribeye, strip, or sirloin work well. Thinner steaks overcook quickly and thicker cuts may need finishing in the oven; marbling helps flavor and crust development.

Step 2: Bring steak to room temperature
Remove steak from the fridge 30 to 45 minutes before cooking so its center warms to near room temperature. An even internal temperature promotes uniform searing and reduces overcooking the edges while the center heats.
Step 3: Pat dry and season simply
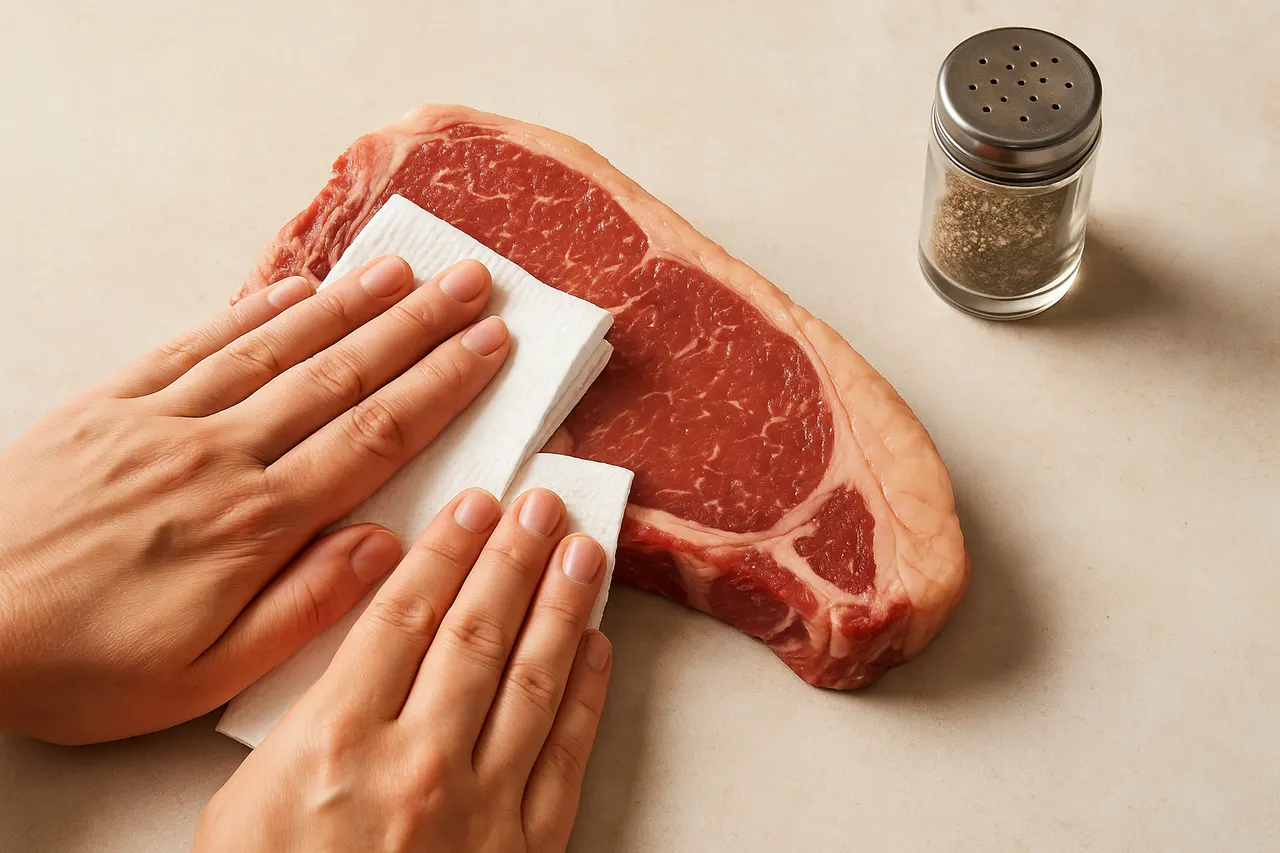
Use paper towels to thoroughly pat both sides dry, then season with 1/2 to 1 teaspoon kosher salt per side and a few grinds of black pepper. Dry surface and salt help proteins brown quickly and create a tighter crust.
Step 4: Preheat a heavy pan until smoking
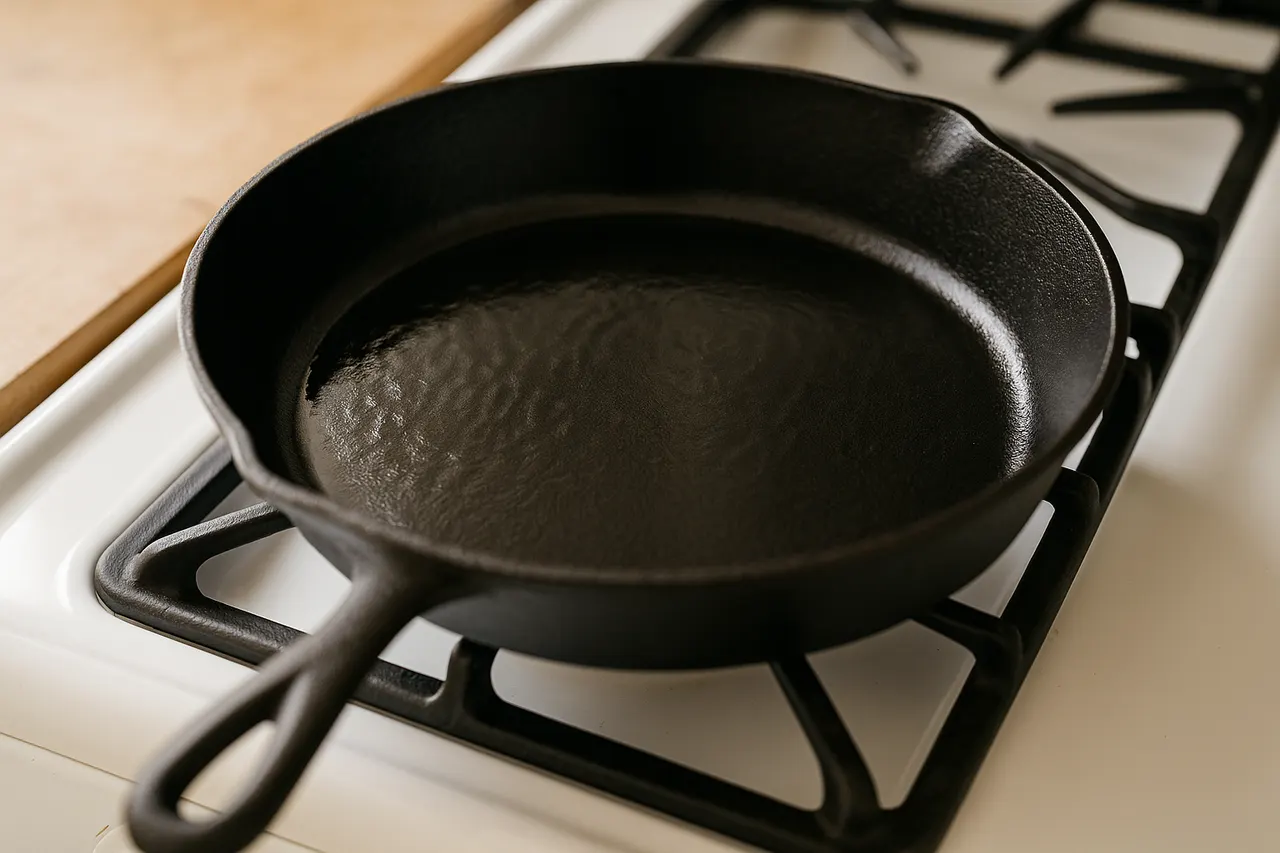
Use a heavy skillet or cast-iron pan and heat it over high for 4 to 6 minutes until it is very hot and just beginning to smoke. A properly hot pan is essential because it instantly sears the surface and prevents sticking.
Step 5: Add high-smoke-point oil
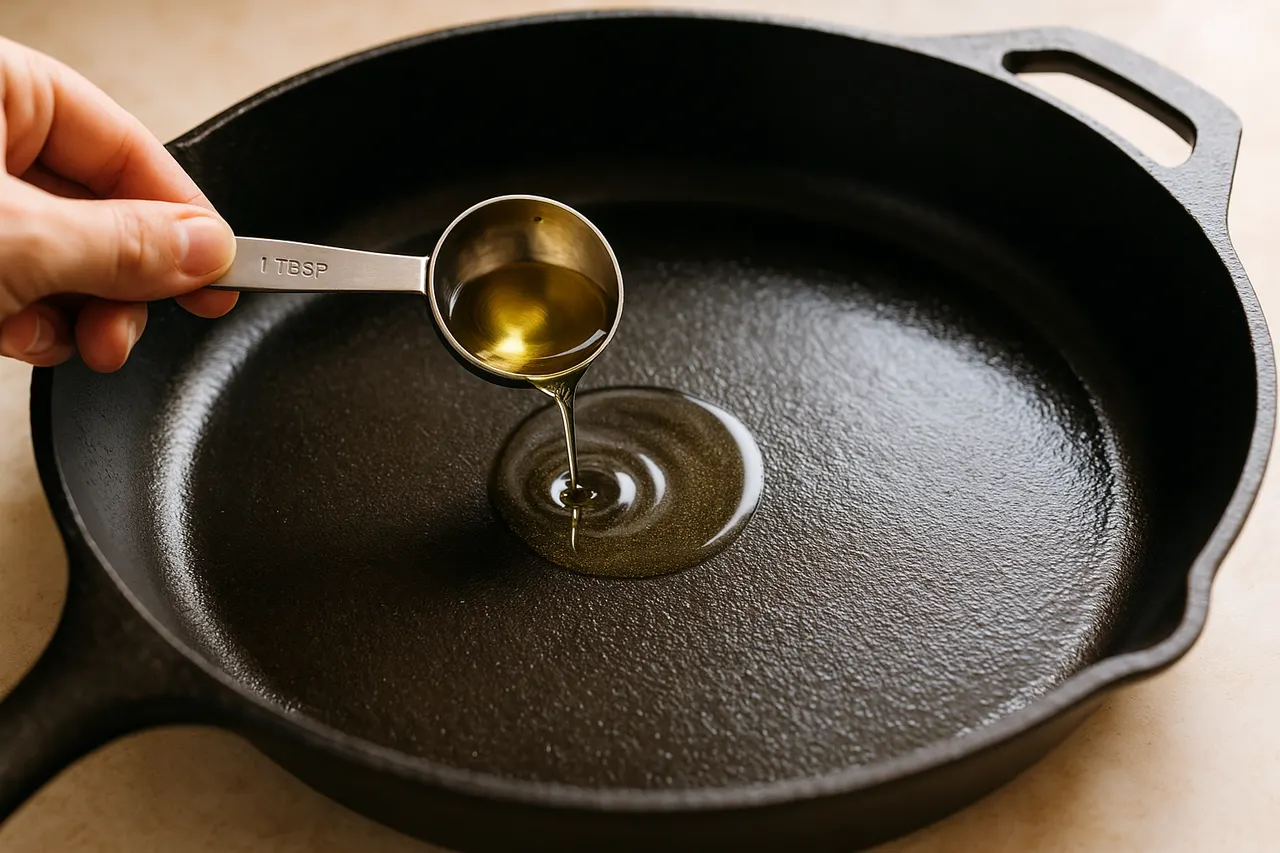
Swirl in 1 tablespoon of neutral oil like canola or grapeseed right before adding the steak. Oils with high smoke points tolerate the very high heat needed for rapid browning without burning.
Step 6: Sear without moving 2–3 minutes per side
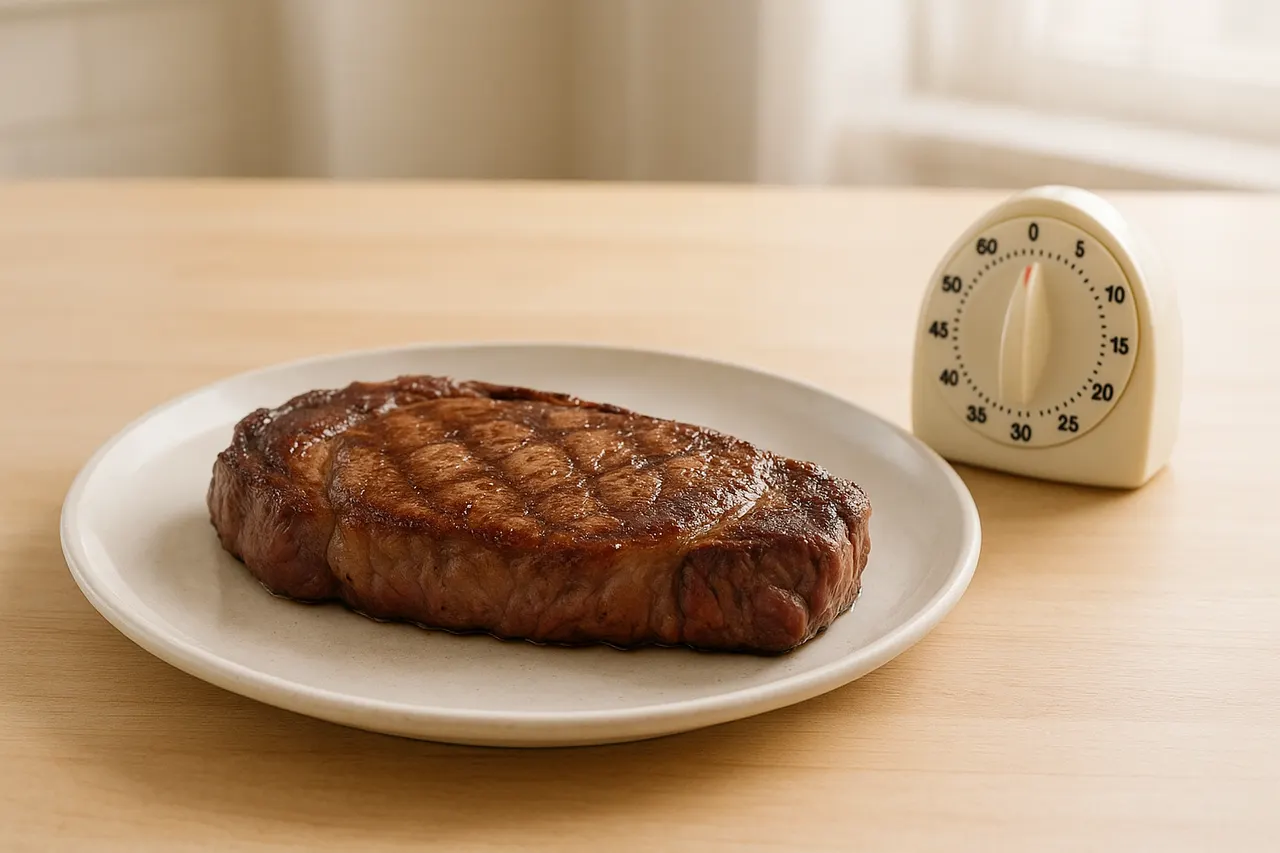
Place steak in pan and press gently for full contact, then cook undisturbed for 2 to 3 minutes per side for medium-rare on a 1 to 1.5-inch steak. Resist flipping early; constant movement prevents formation of an even crust.

Step 7: Finish by indirect heat and rest
If the steak is thick or needs more doneness, transfer to a 375°F (190°C) oven for 4 to 8 minutes until desired internal temp (120°F rare, 130°F medium-rare, 140°F medium). Rest 5 to 10 minutes before slicing to allow juices to redistribute.

- Use an instant-read thermometer to check doneness — 120°F rare, 130°F medium-rare, 140°F medium, 150°F medium-well.
- For extra flavor, add a 1 tablespoon knob of butter, 2 crushed garlic cloves, and a sprig of thyme to the pan during the last 30 seconds and spoon the melted butter over the steak.
- Trim only large or tough fat seams; leaving some fat improves searing and flavor. Score any thick fat cap lightly so it renders evenly.
- If pan smoke is excessive, use your stove’s vent hood and open a window; choose an indoor/outdoor grill or cast-iron plancha for better ventilation if needed.
- Avoid overcrowding the pan — cook one or two steaks at a time so the pan temperature recovers quickly between steaks.
- For a stronger crust, sprinkle an even dusting of 1/4 teaspoon baking soda mixed into the salt before seasoning; it raises surface pH and promotes browning, but use sparingly.
- Never add cold steak straight to a hot pan — it causes severe splattering and uneven cooking.
- Do not leave oil unattended on high heat; overheated oil can smoke excessively or ignite. Reduce heat if smoke becomes heavy.
- Avoid cutting into the steak immediately after cooking; slicing too soon melts juices out and dries the meat.
- If you see persistent blackened burnt spots rather than a mottled brown crust, the heat is too high or the pan surface is contaminated; stop, let the pan cool, wipe it clean, and start again.
Was this guide helpful?
More Food & Entertaining guides
How to make stovetop shakshuka with tender eggs and balanced tomato sauce
Shakshuka is a comforting North African–style skillet of eggs poached in a spiced tomato sauce. This guide walks you through building a balanced sauce and gently cooking tender eggs on the stovetop so yolks stay silky while the sauce is bright and flavorful.
How to make homemade sourdough starter and maintain regular feedings
Making a sourdough starter is a simple, rewarding kitchen project that captures wild yeast and beneficial bacteria to leaven bread. With just flour, water, and a little patience you can build a lively culture and keep it healthy with regular feedings. Follow the step-by-step routine below to create and maintain a starter that will power many loaves.
How to assemble and store layered salads so they don’t get soggy before eating
Layered salads are a colorful, make-ahead way to serve a crowd, but soggy ingredients can ruin the texture. With a few simple construction and storage strategies you can keep greens crisp and dressings separated for 24–72 hours. Follow these steps to assemble jars or bowls that travel well and taste fresh when served.